Visual Merchandising Tool
The Merchandising tool helps shop owners actively promote (or demote) items for specific search queries or collections. With the Merchandising tool, you can influence results and boost certain products in specific search contexts:
- Promote high-performing products for popular searches
- Add related products to searches with no results
The Merchandising tool uses Algolia’s Rules. Rules are if-then statements that allow you to assign actions to specific triggers. For example, if a user types “dress”, then promote the item “Red satin dress”.
You need to be on the Premium plan to use this feature.
How you can influence search results
For a given search query, the Merchandising tool lets you:
- Pin a product. Assign an absolute position to a product
- Hide a product. Remove the product from the search results
- Promote a product. Move the product higher in the search results
- Demote a product. Move the product lower in the search results
- Add a product. Using the search bar, add a product that wouldn’t be on the first page of the results otherwise. The item is assigned to the first available (not pinned) position.
How the Merchandising tool works
When you modify a search query’s results, the Merchandising tool creates a new Rule. You can assign multiple actions to a Rule: you can promote, demote, pin, and hide as many objects as you want. However, each query and its associated actions is stored as a single Rule.
You can view the Rules in the Algolia dashboard.
Every Rule created through the Merchandising tool can be identified in the Algolia dashboard by its objectID: shopify-merchandising-<query>.
Changes made through the Merchandising tool are sent to Algolia, but not the other way around. If you create a rule in the Algolia dashboard, it won’t be sent to the Merchandising tool.
If you created a Rule in the Merchandising tool, don’t delete it in the Algolia dashboard.
The Merchandising tool only supports the first page of search results. The number of results shown in the Merchandising tool is the same as the Number of Products shown in the InstantSearch settings in the Search Options of the application.
How to create a new Rule
-
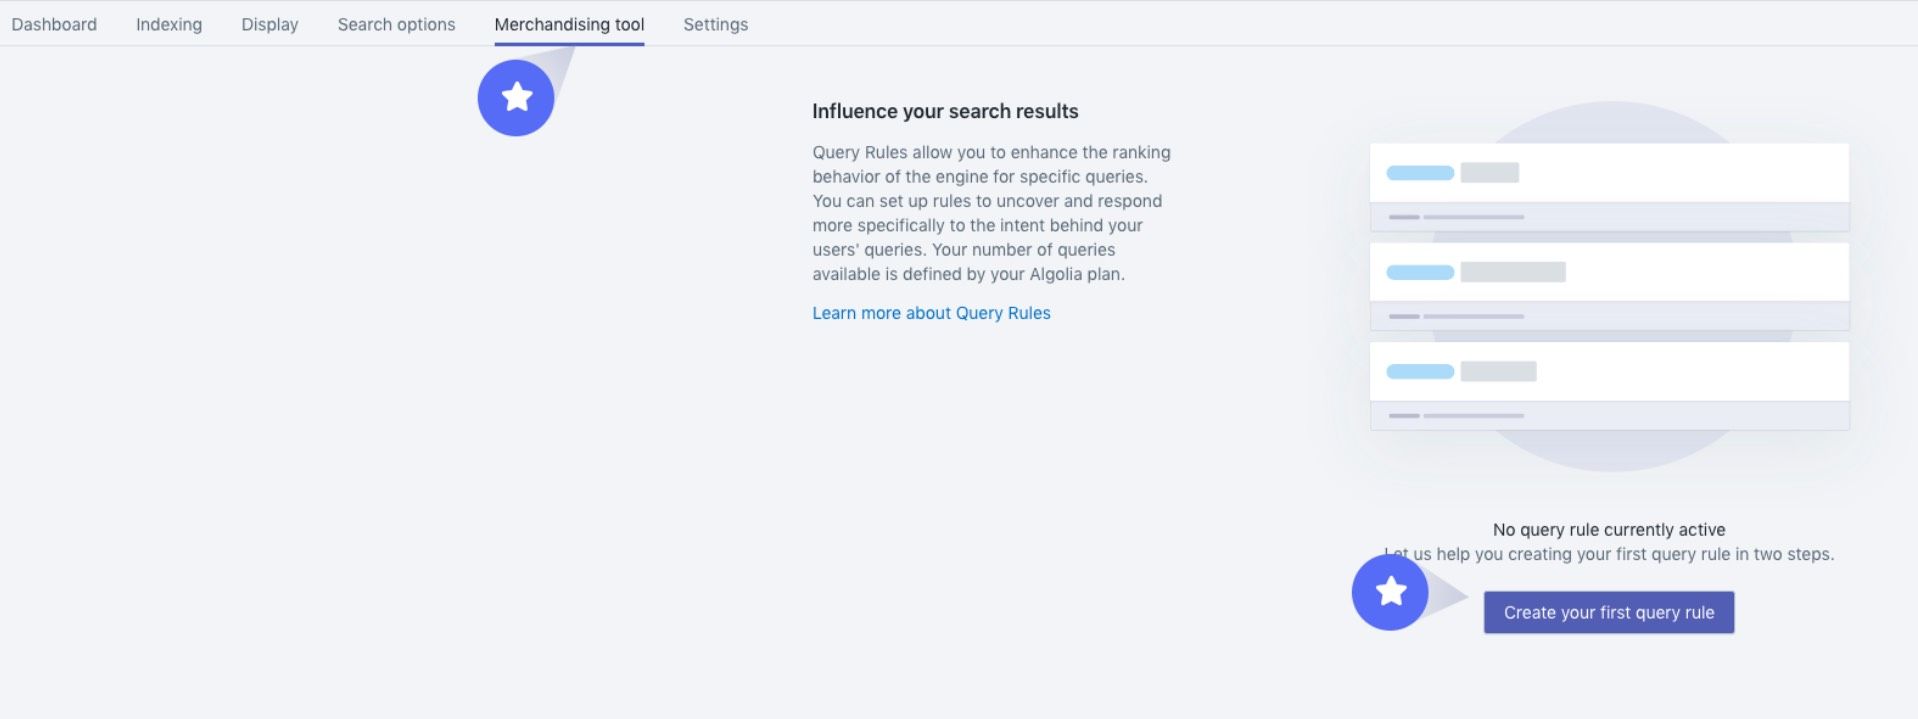
Open the Merchandising tool tab and click Create your first query rule.
-
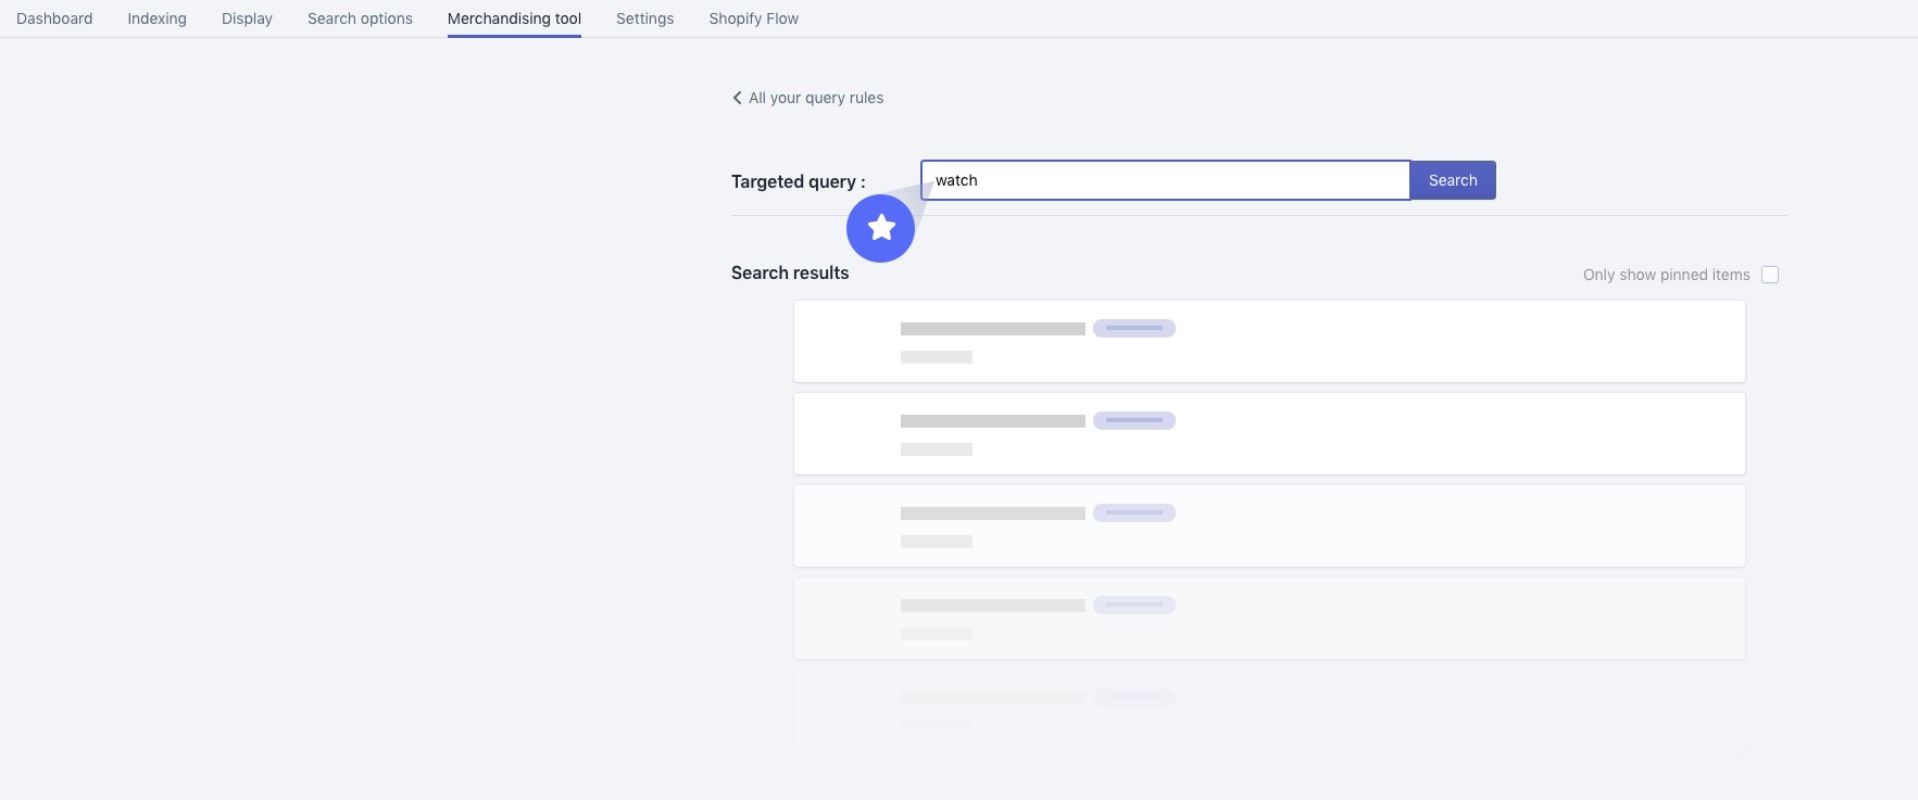
Type a search query you want to assign actions to, and click Search. You can change the order of the results.
How to promote or demote products
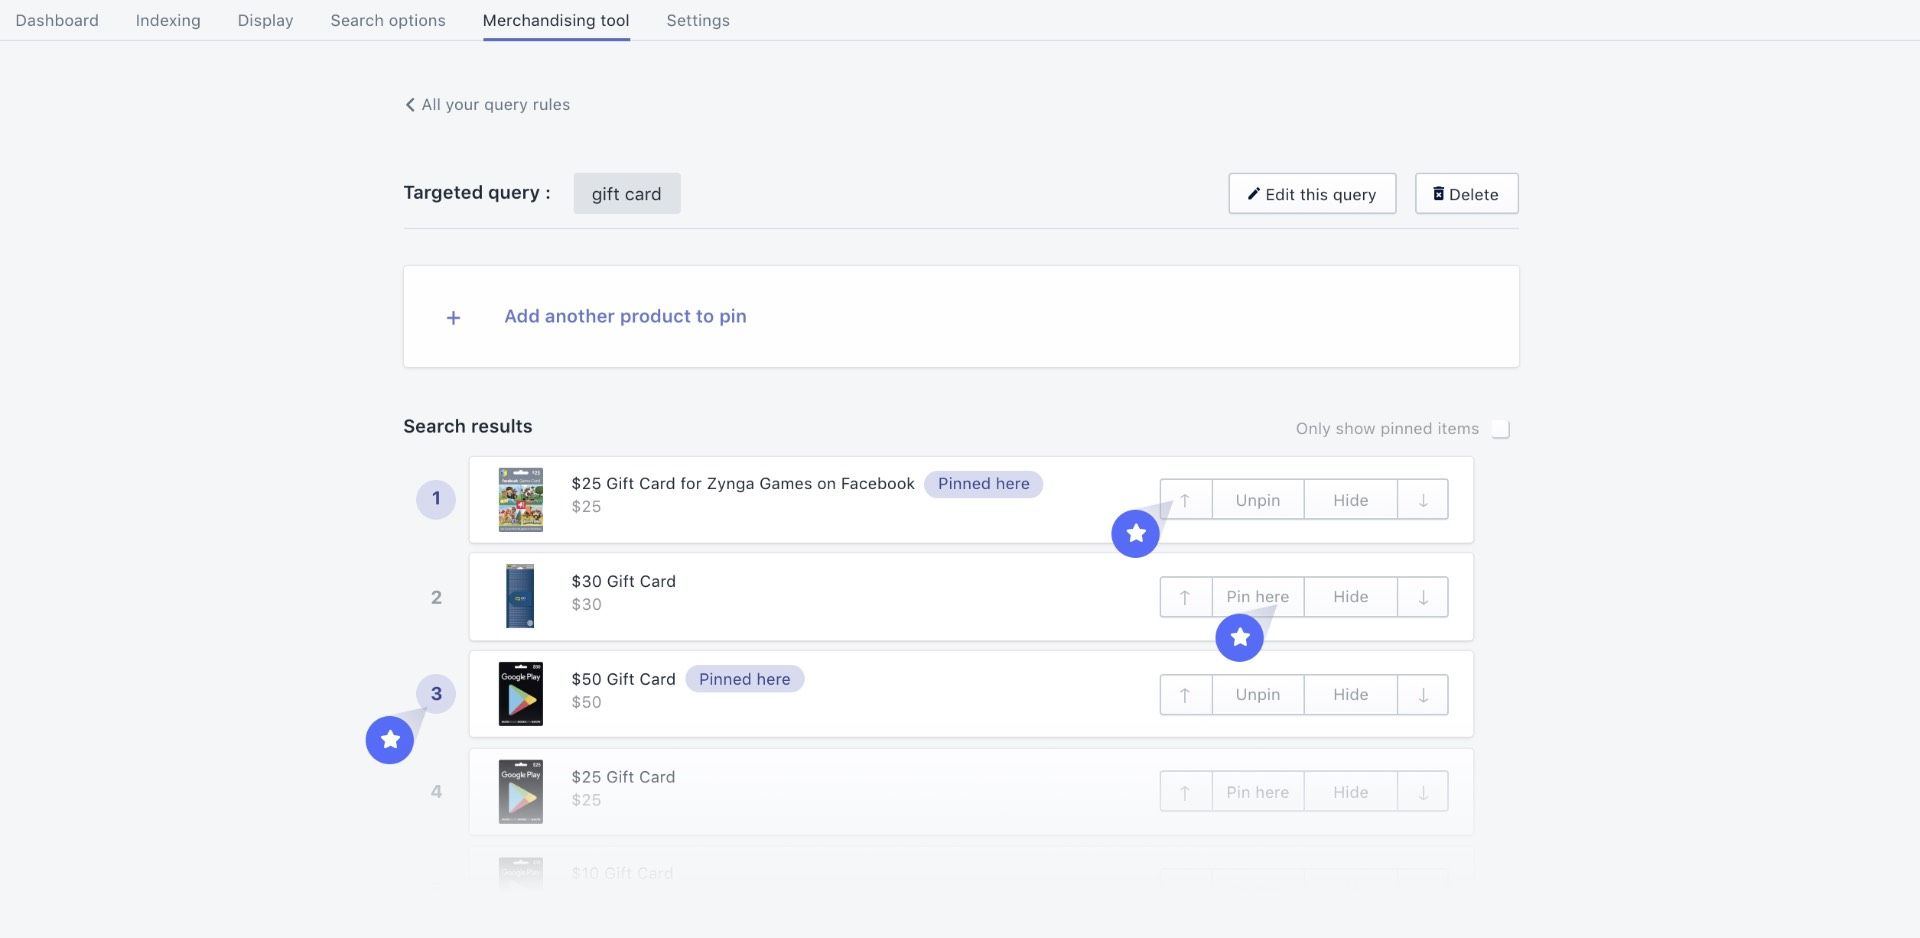
Use the arrow buttons to adjust the desired position of a product: up or down.
How to pin a product that is outside search results
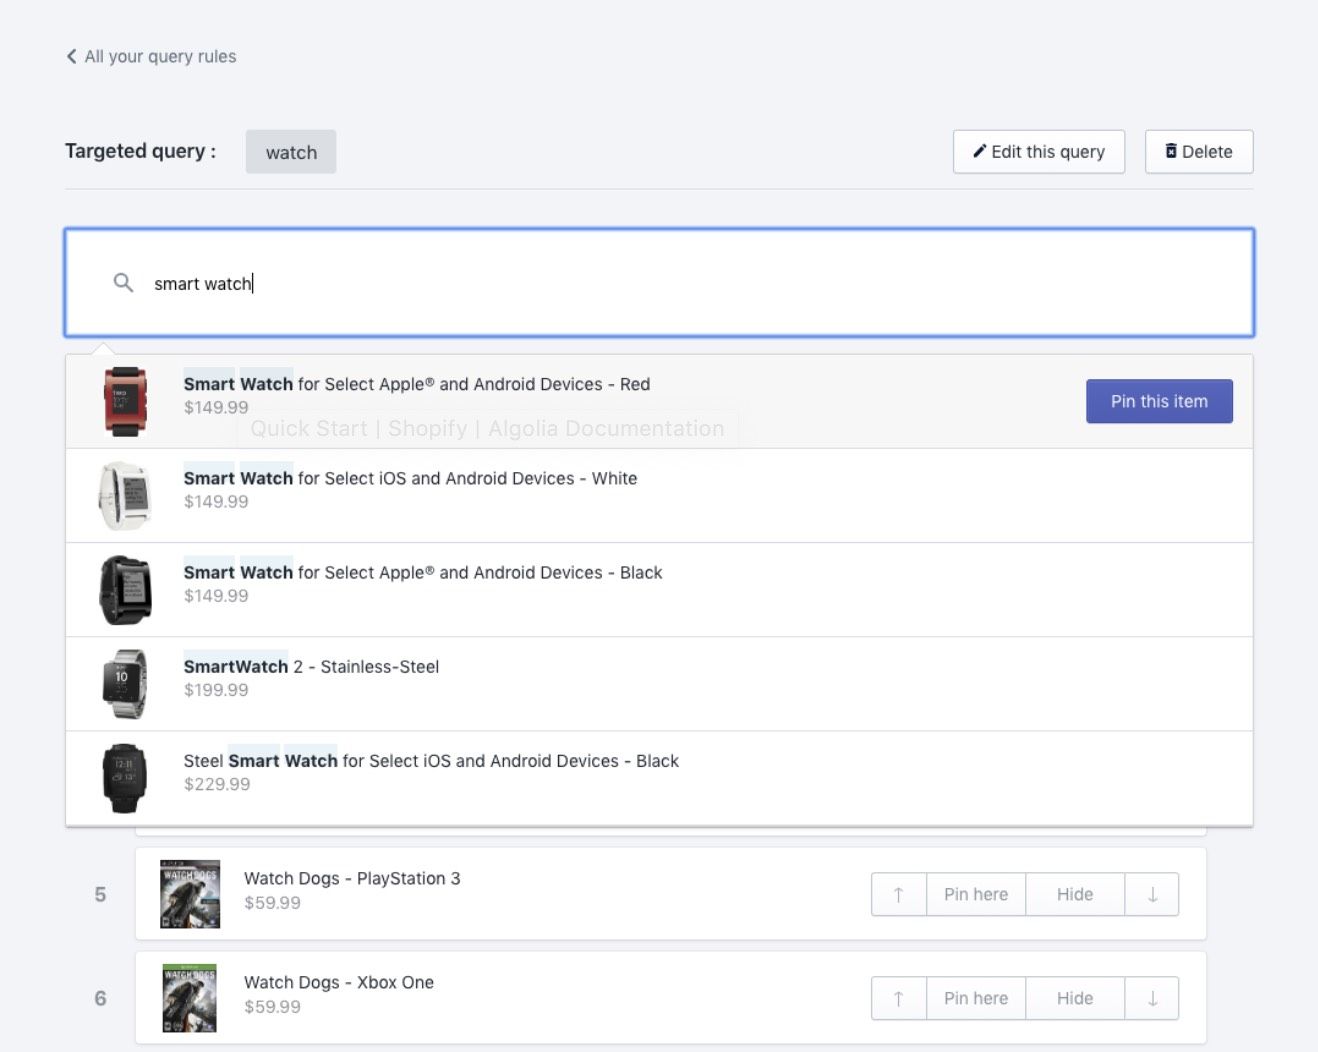
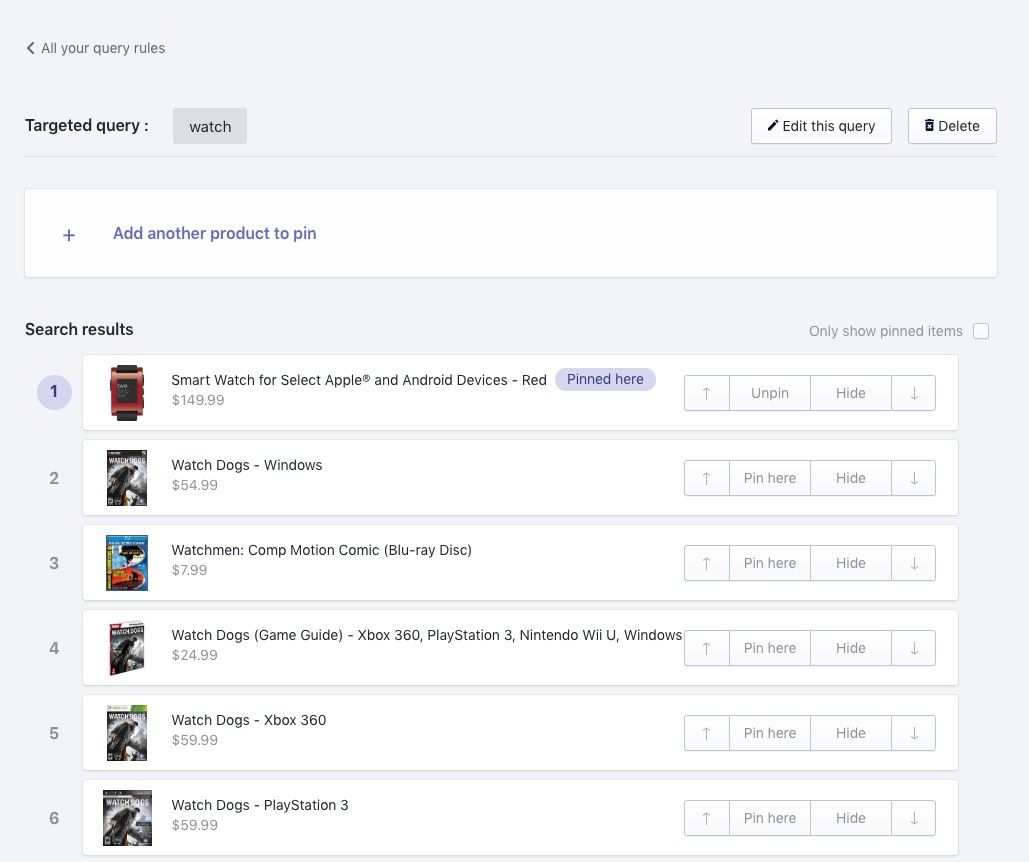
In the following example, the search query “watch” returns video games.
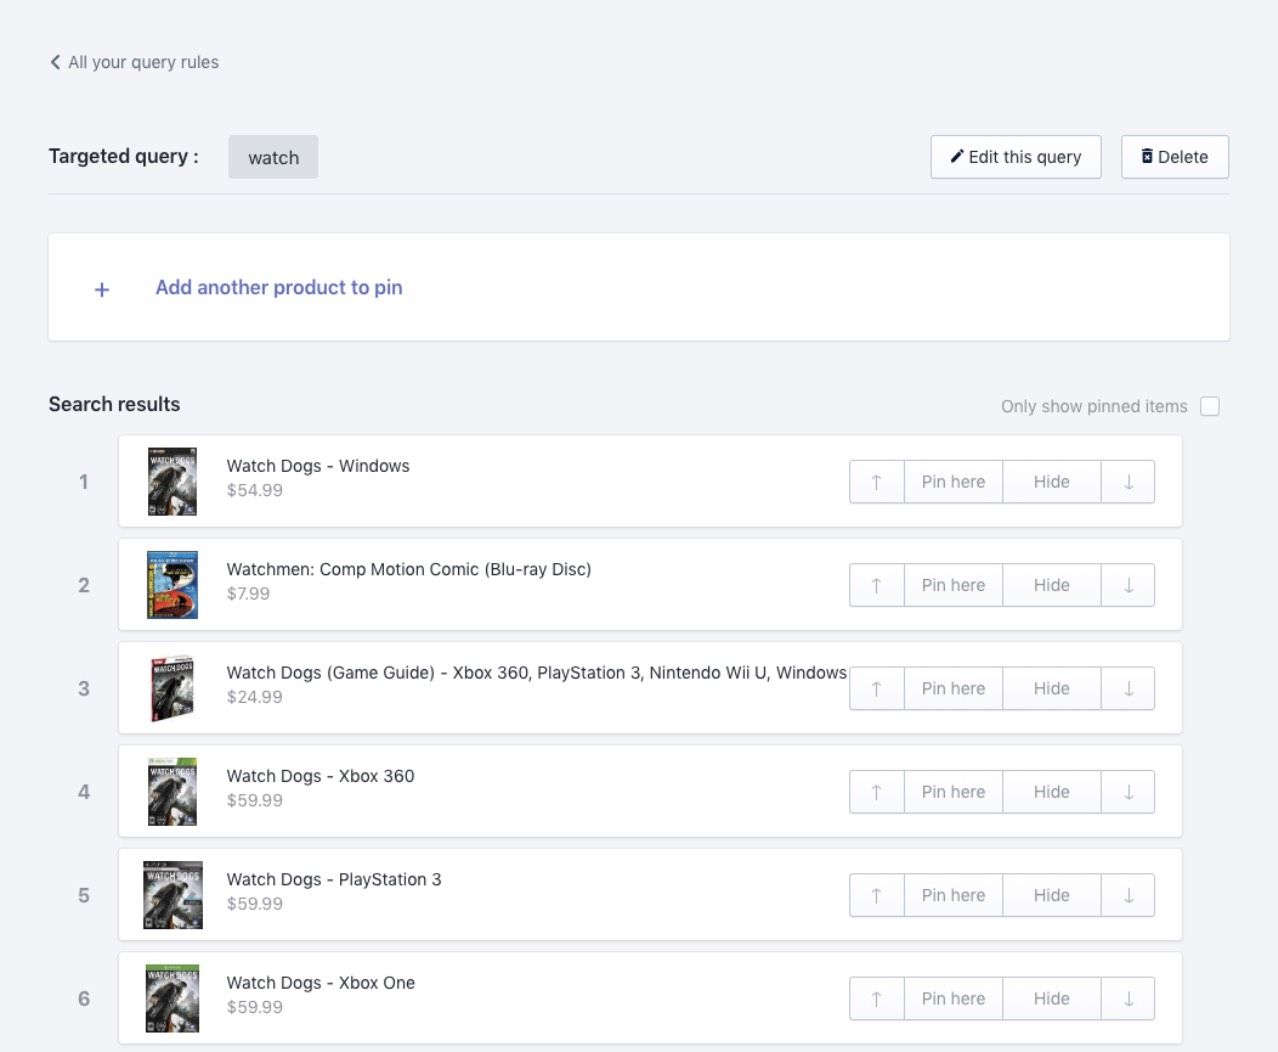
To show wrist watches instead:
-
Click Add another product to pin and search for the item you want to promote.
-
The items are pinned to the first available (not pinned) position. Other pinned items aren’t impacted.
How to hide a product from search results
To hide a product from your search results, select an item and click Hide. The item won’t appear in your search results and is listed at the bottom of the page under Items hidden from search results. If you want to return a hidden product to your search result, select it and click Add to results. The item will be restored to either its initial position—if no other product has been pinned to it—or to the next available position.
How to make pinned items filterable
By default, pinned items show up in the search results even if they don’t match applied filters. You can change this behavior by selecting Pinned items must match active filters to be displayed in the Merchandising tool > Merchandising settings section.
For example, if you pinned a red item that is on sale, but the user filters on blue items, this setting ensures that only blue items appear (discarding your pinned red item).

Widget updates
The InstantSearch widget was updated to support this new feature for merchandised collections.
You can find the latest version in algolia_instant_search.js.liquid.
1
2
3
4
5
6
7
8
9
10
11
12
13
14
15
16
17
18
@@ -177,17 +177,11 @@
     // targeting collection pages
     if (collectionPage) {
       // Collection page merchandising:
-      // send rulesContext for promoted results only if no filters active
-      if (
-        !hasRefinements(searchFunctionHelper, instant.facets.list) &&
-        Number(page) === 0
-      ) {
         // If we are on a collection page, `collectionRulesContextValue` is defined
         if (collectionRulesContextValue) {
           searchFunctionHelper.setQueryParameter('ruleContexts', [
             collectionRulesContextValue.toString(),
           ]);
         }
       } else {
          searchFunctionHelper.setQueryParameter('ruleContexts', []);
       }
Merchandising a collection in the Algolia dashboard (Visual Editor)
You can also merchandise your collections with the Visual Editor in the Algolia dashboard.
You need to perform these steps:
- Create a new rule with the visual editor.
- Set the collection context.
- Filter the results on that particular collection.
- Pin or hide your products.
You need to enable the collection search page feature to merchandise collections.
Create a new Rule with the Visual Editor
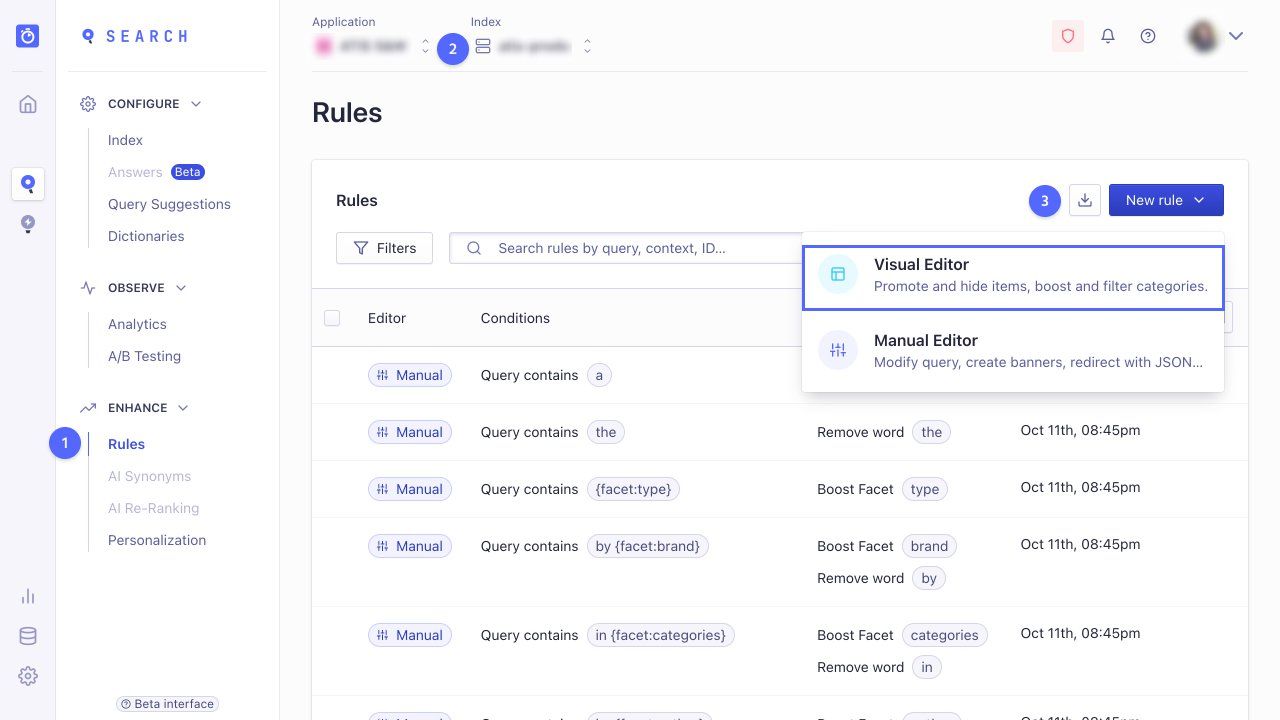
- Go to the Rules section in the Algolia dashboard and select your index to which you want to add a Rule.
-
Select either Create your first Rule or New Rule and select Visual Editor.
Set the collection context
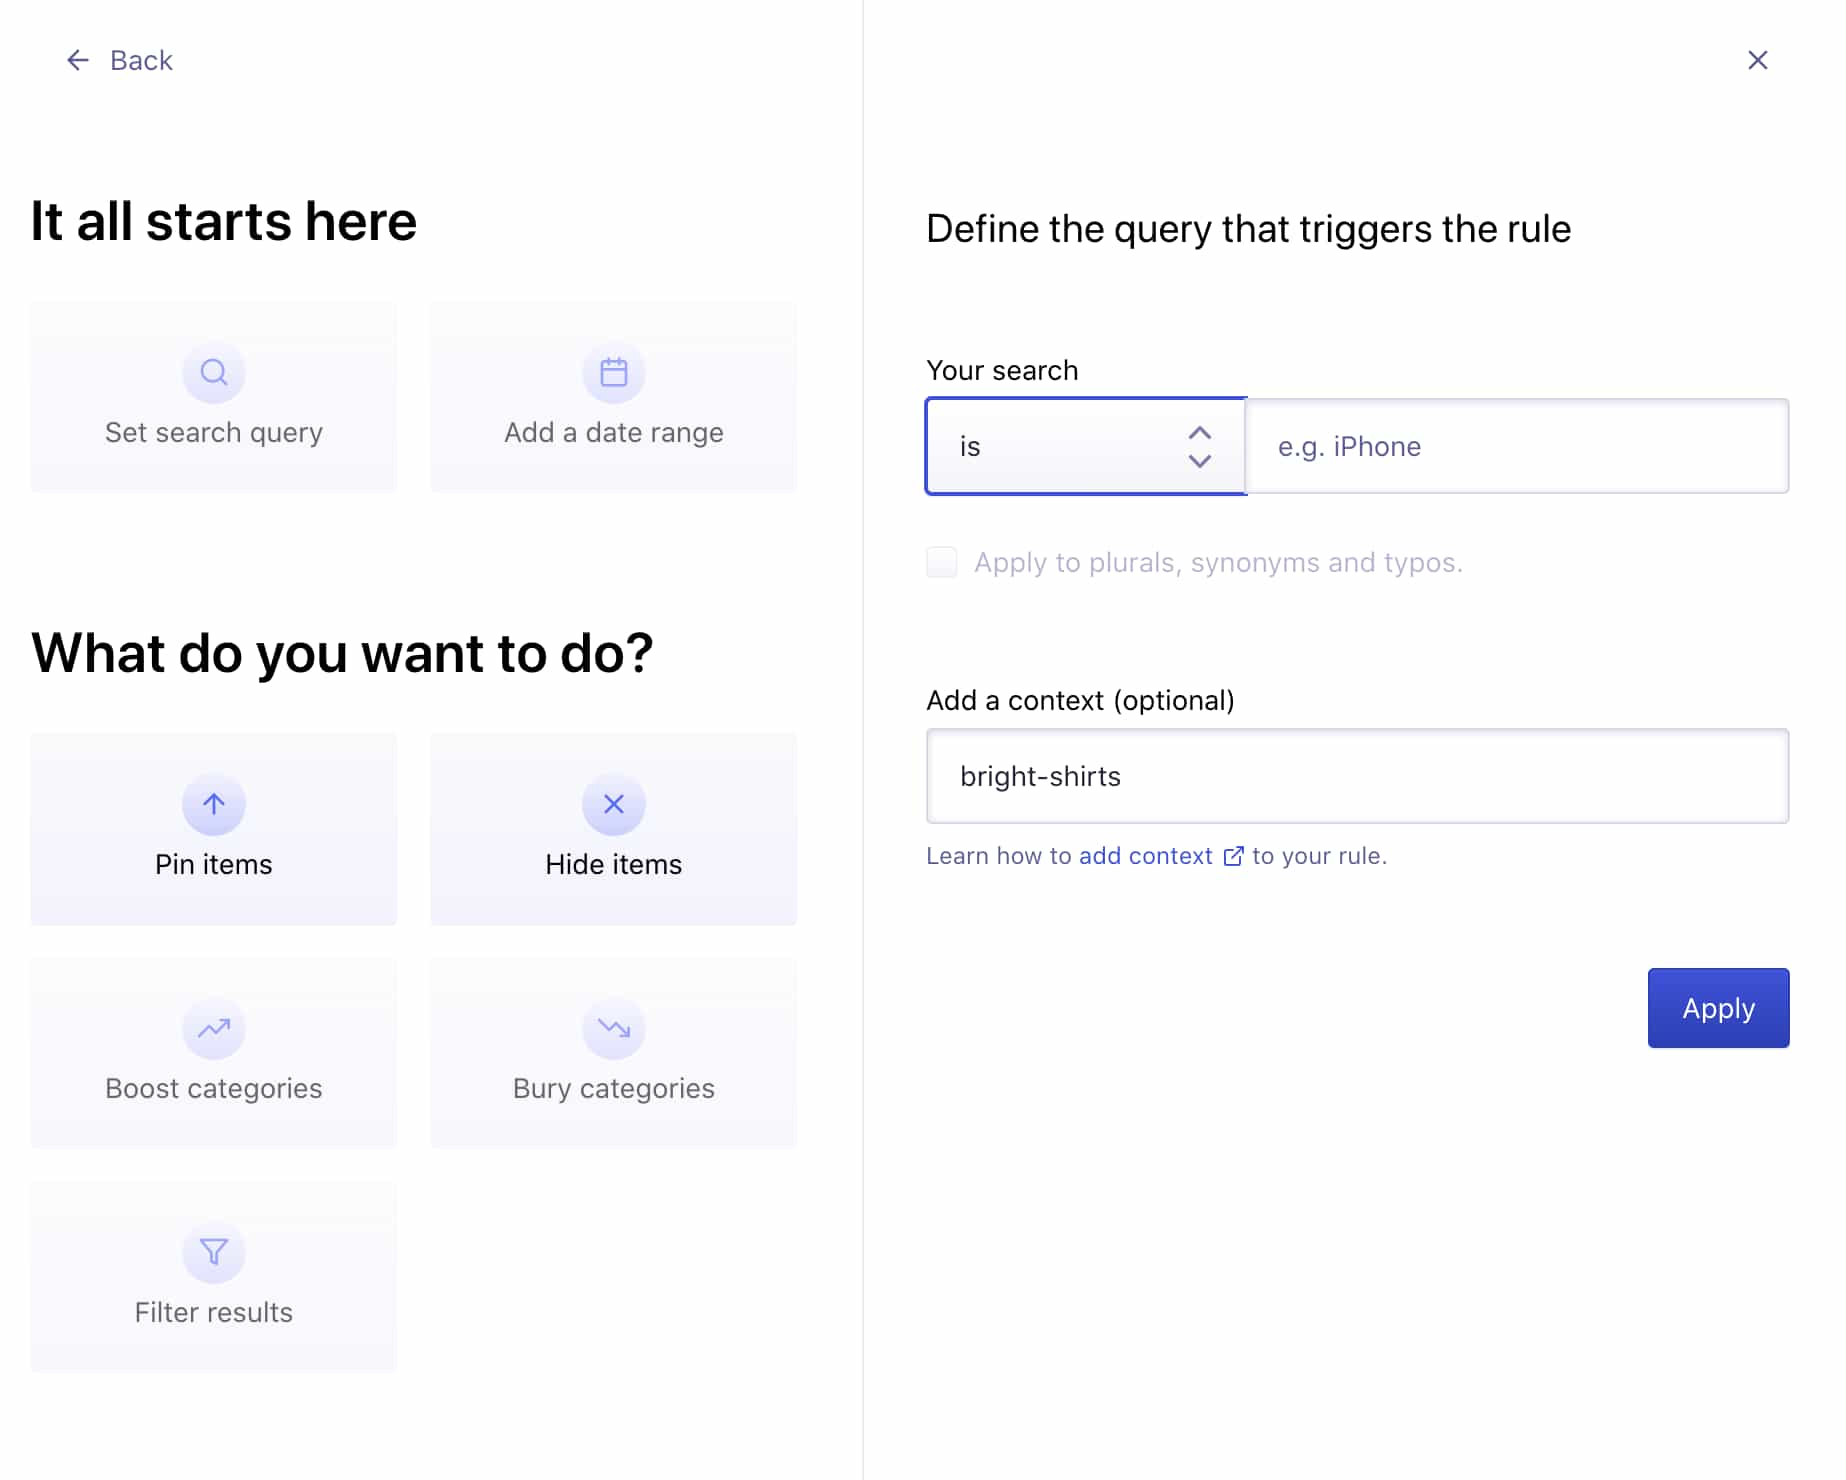
- In the Visual Editor, click on Set a search query.
- In the menu next to Your search, select is and leave the following input field empty.
-
In Add a context (optional), add a collection handle. To trigger a Rule when a user lands on a collection page, the search query must be empty and the context must be equal to your collection handle.
The collection handle is the last part of your collection page’s URL.
You can also find it when editing your collection’s “website SEO” in your Shopify admin interface.
For example, if the URL of the collection “Bright Shirts” is mystore.myshopify.com/collections/bright-shirts,
then its collection handle is bright-shirts.
Filter the results on a particular collection
To display only the products of a particular collection, click Filter results in the What do you want to do? section. In the Category section, you can either choose to filter on:
collection_ids—an array of the collection IDs the product belongs tocollections—an array of the collection handles the product belongs to
Filtering on the collection_ids attribute is more robust, as changes to the collection ID are less likely.
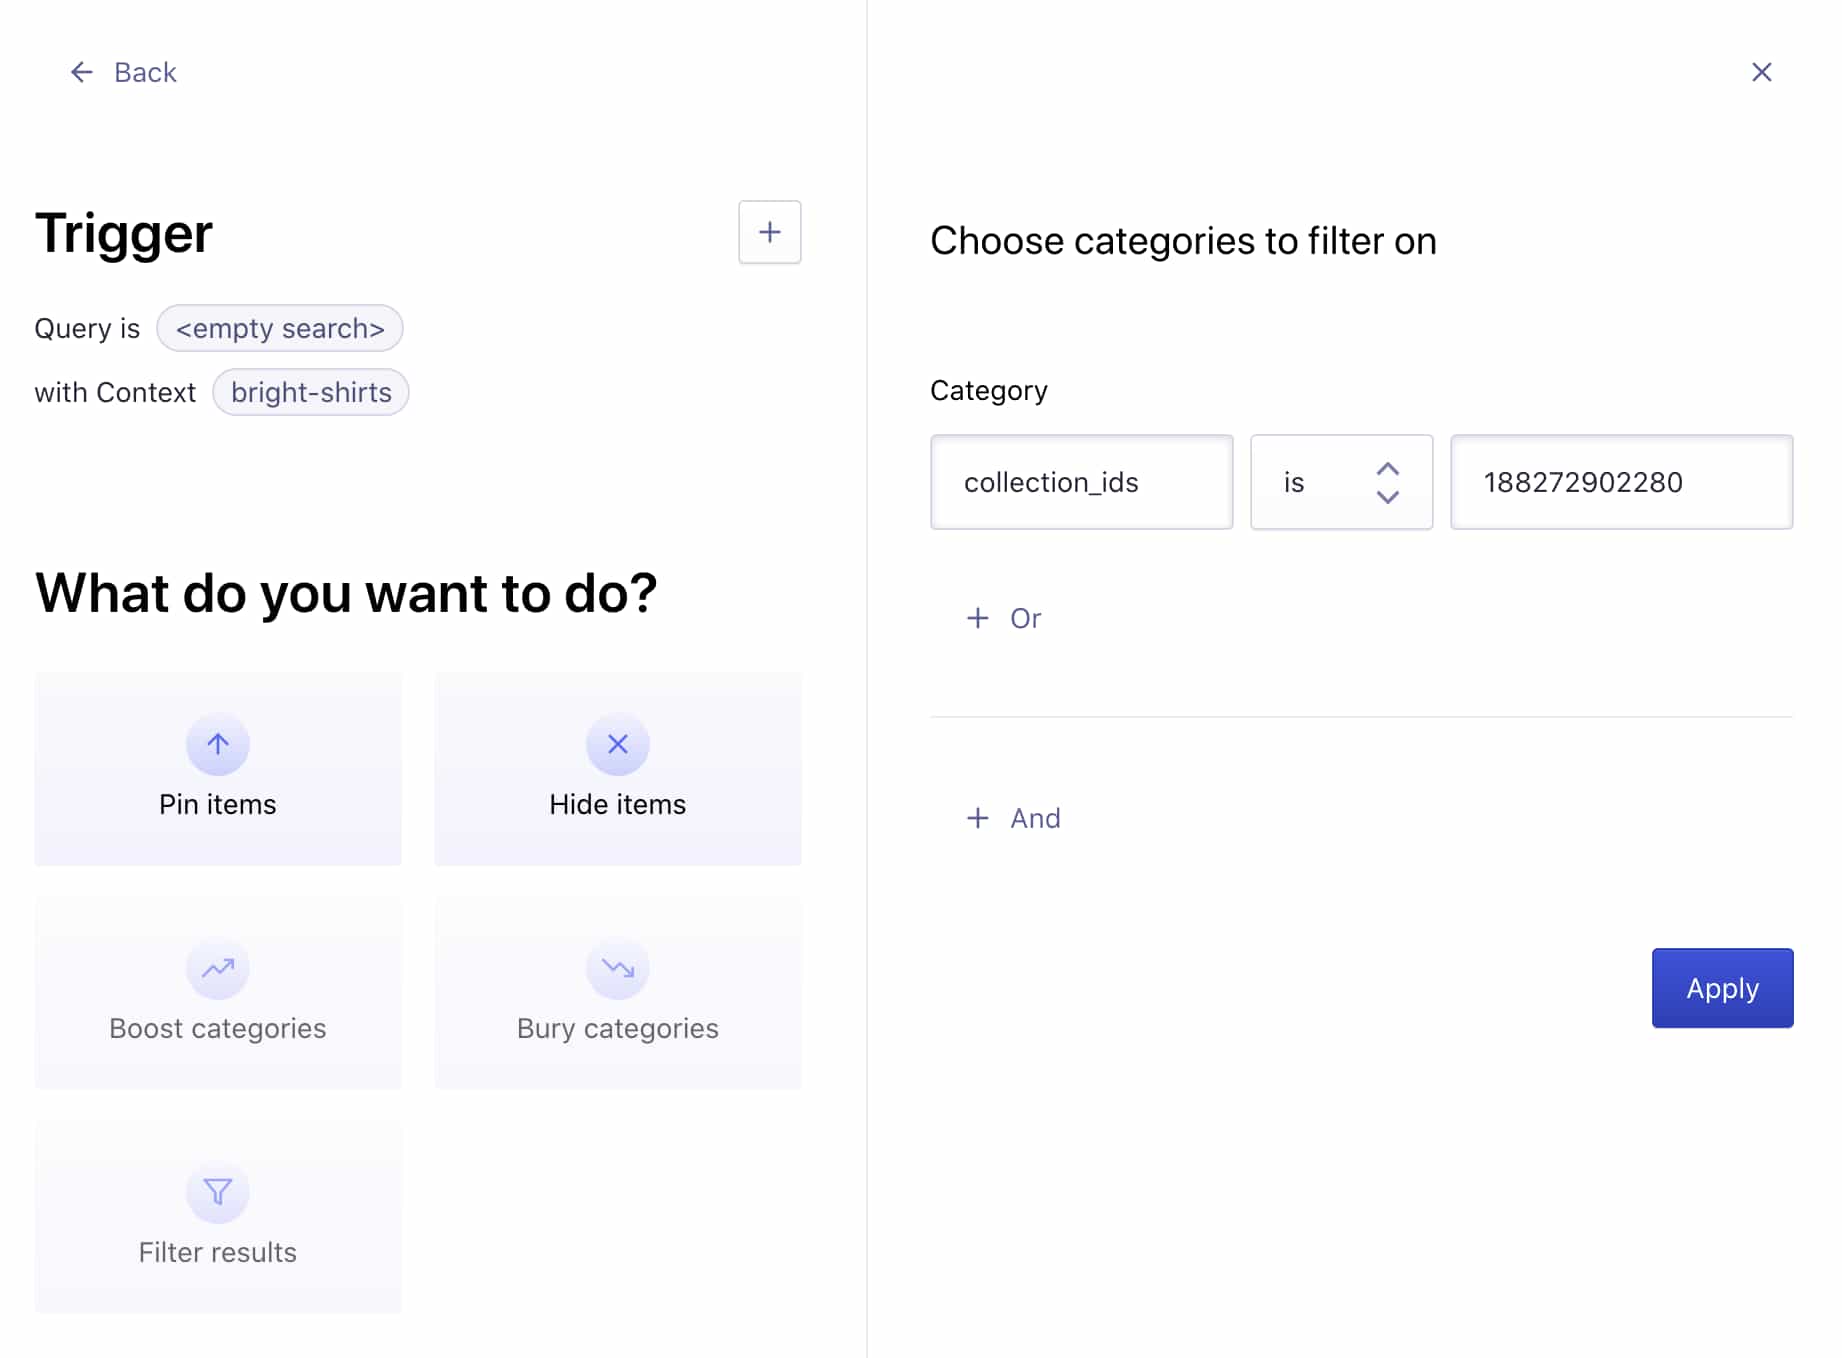
You can find the collection_id in the URL, when editing your collection in Shopify.
For example, if the URL of the collection edition page is mystore.myshopify.com/admin/collections/187530641539, then is ID is 187530641539.
Pin or hide your products
Move the items at the position you want them to appear in the collection page and hide the ones you don’t want to show. Save your selection by clicking Review and Publish.
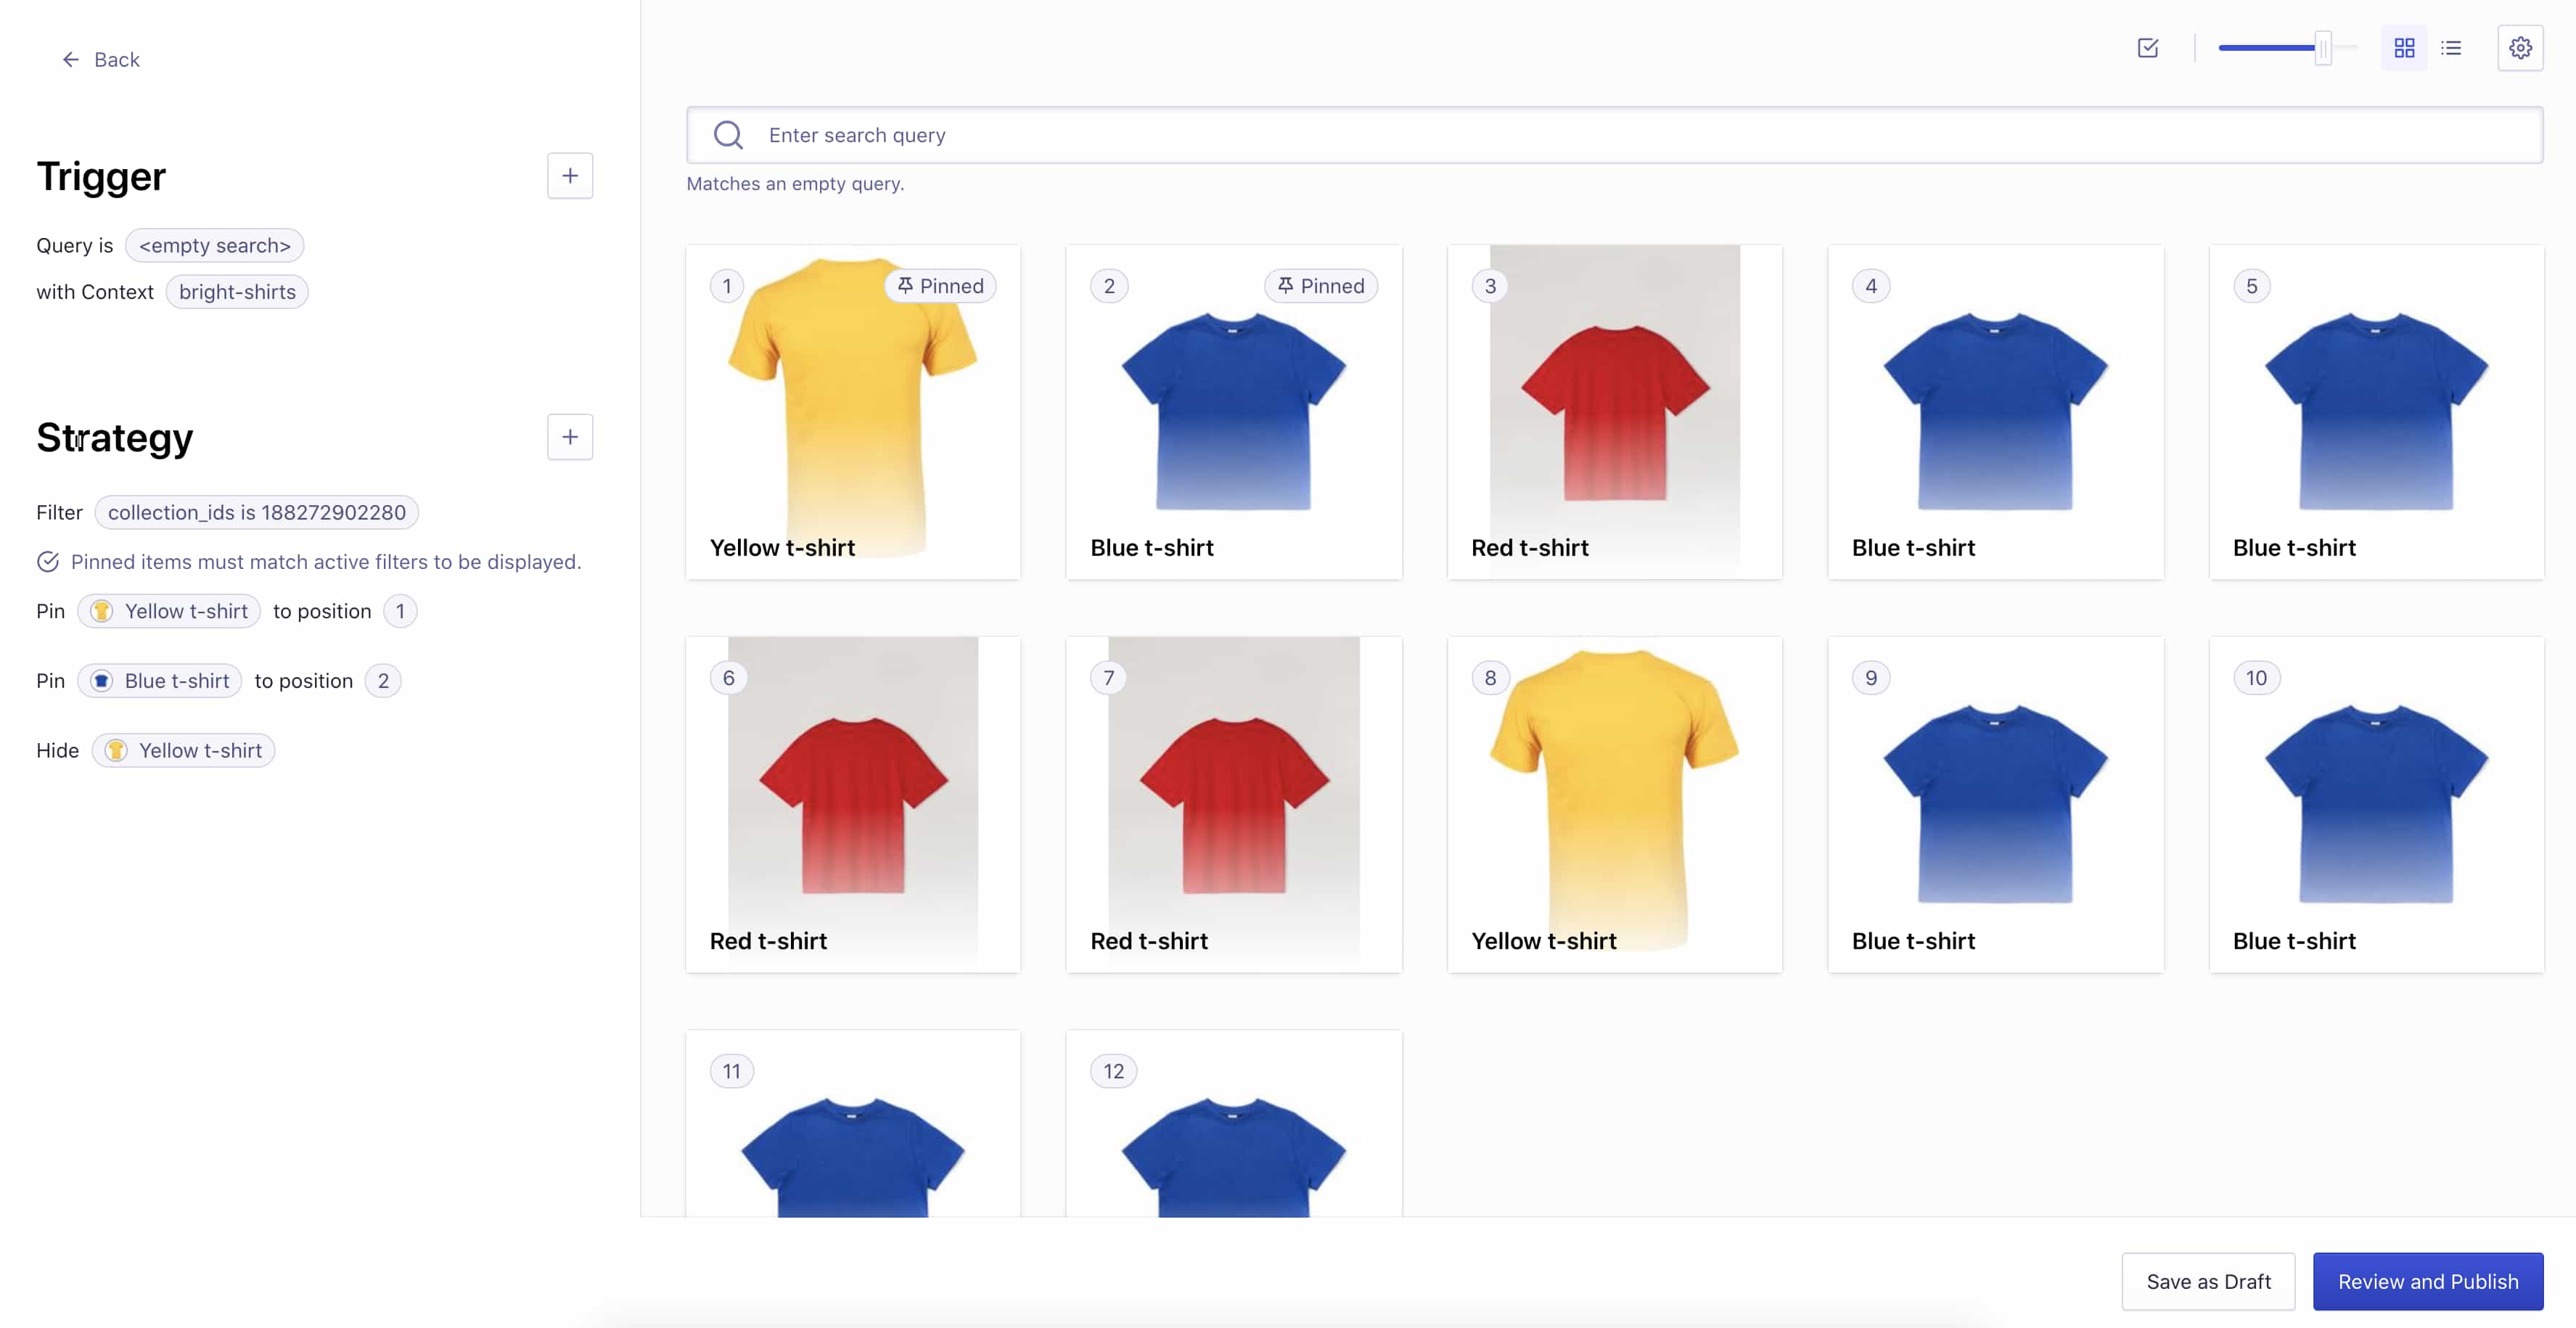
If you want to use the Algolia dashboard to merchandise a collection, the Rule Condition must be an empty query and the context must be the collection handle.
