Add CSV Data to Your Extracted Records
You may wish to add offline data to the web content you are extracting. With the Crawler, you can do this in just three steps:
- Upload your data to Google Sheets.
- Publish your spreadsheet online as a CSV.
- Link the published CSV in your crawler’s configuration.
Prerequisites
Ensure that your spreadsheet’s format is compatible with the crawler:
- It must contain headers.
- One of the headers must be
url(theurlcolumn should contain all URLs that you want to add external data to).
Upload your data to Google Sheets
The first step is to upload your data to Google Sheets. This is highly dependent on the format and storage of your data, but the example uses this Google spreadsheet.
Publish your spreadsheet online
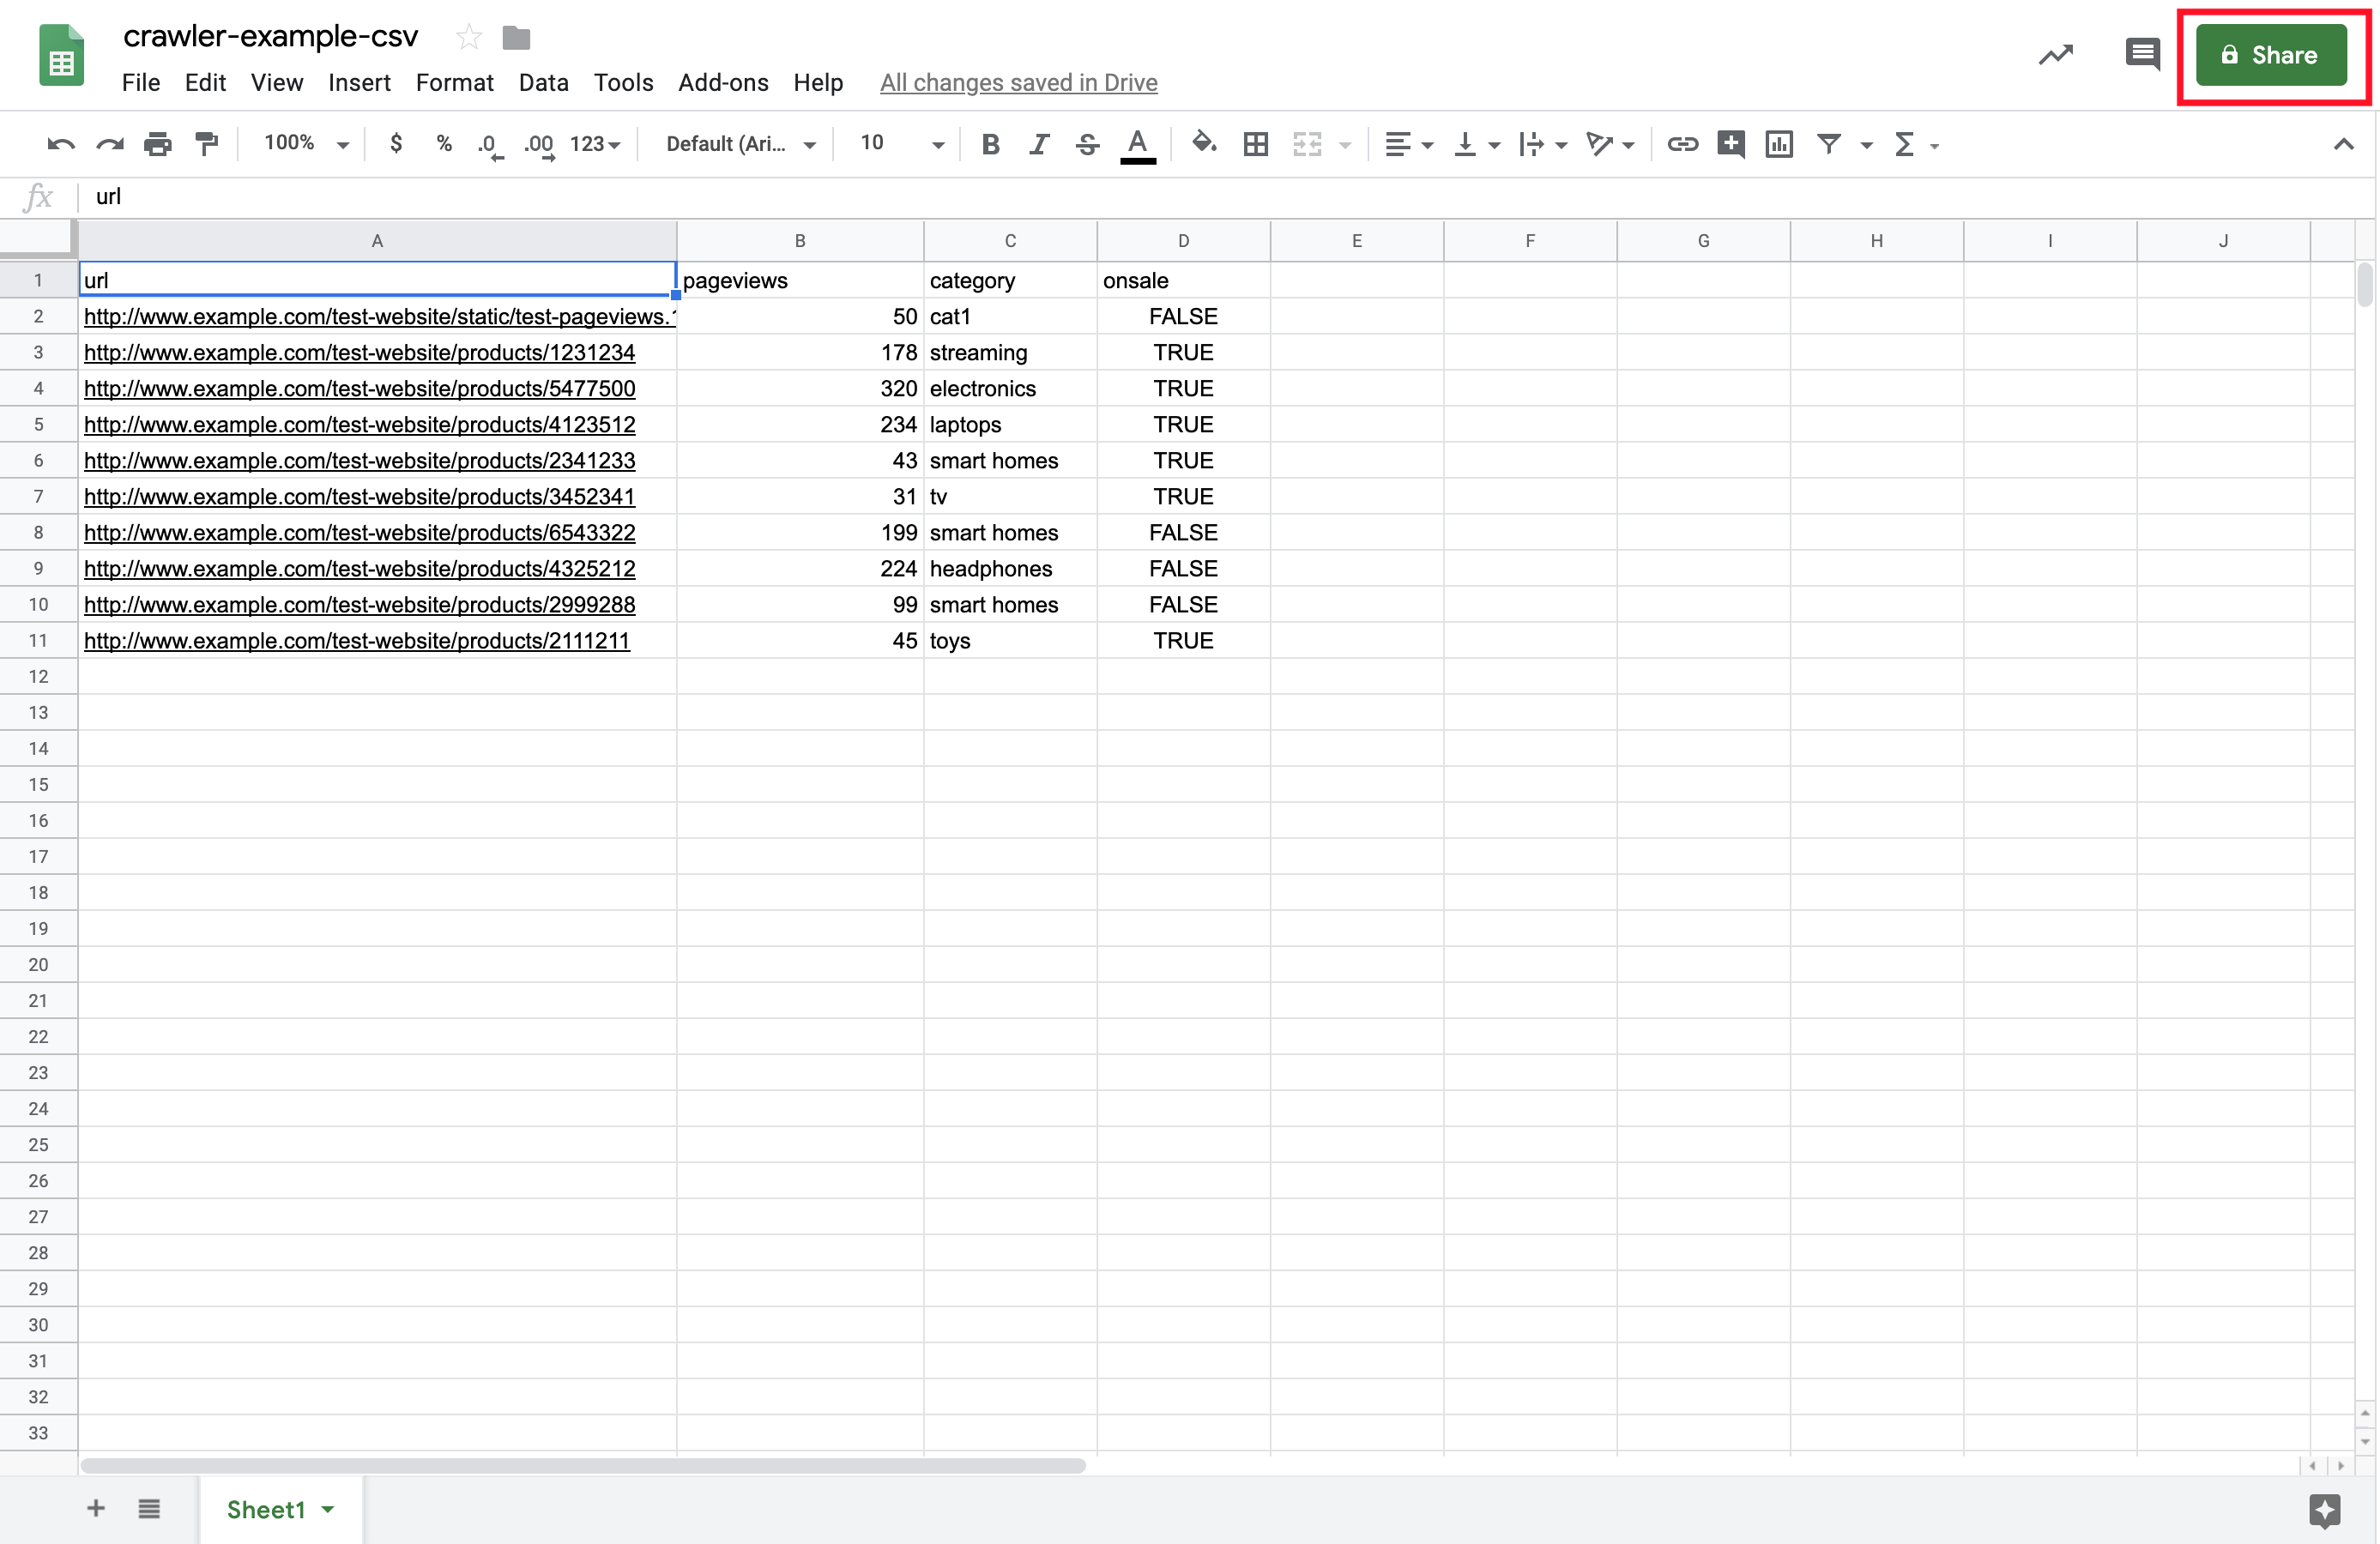
1. Click on the Share button of your Google spreadsheet.
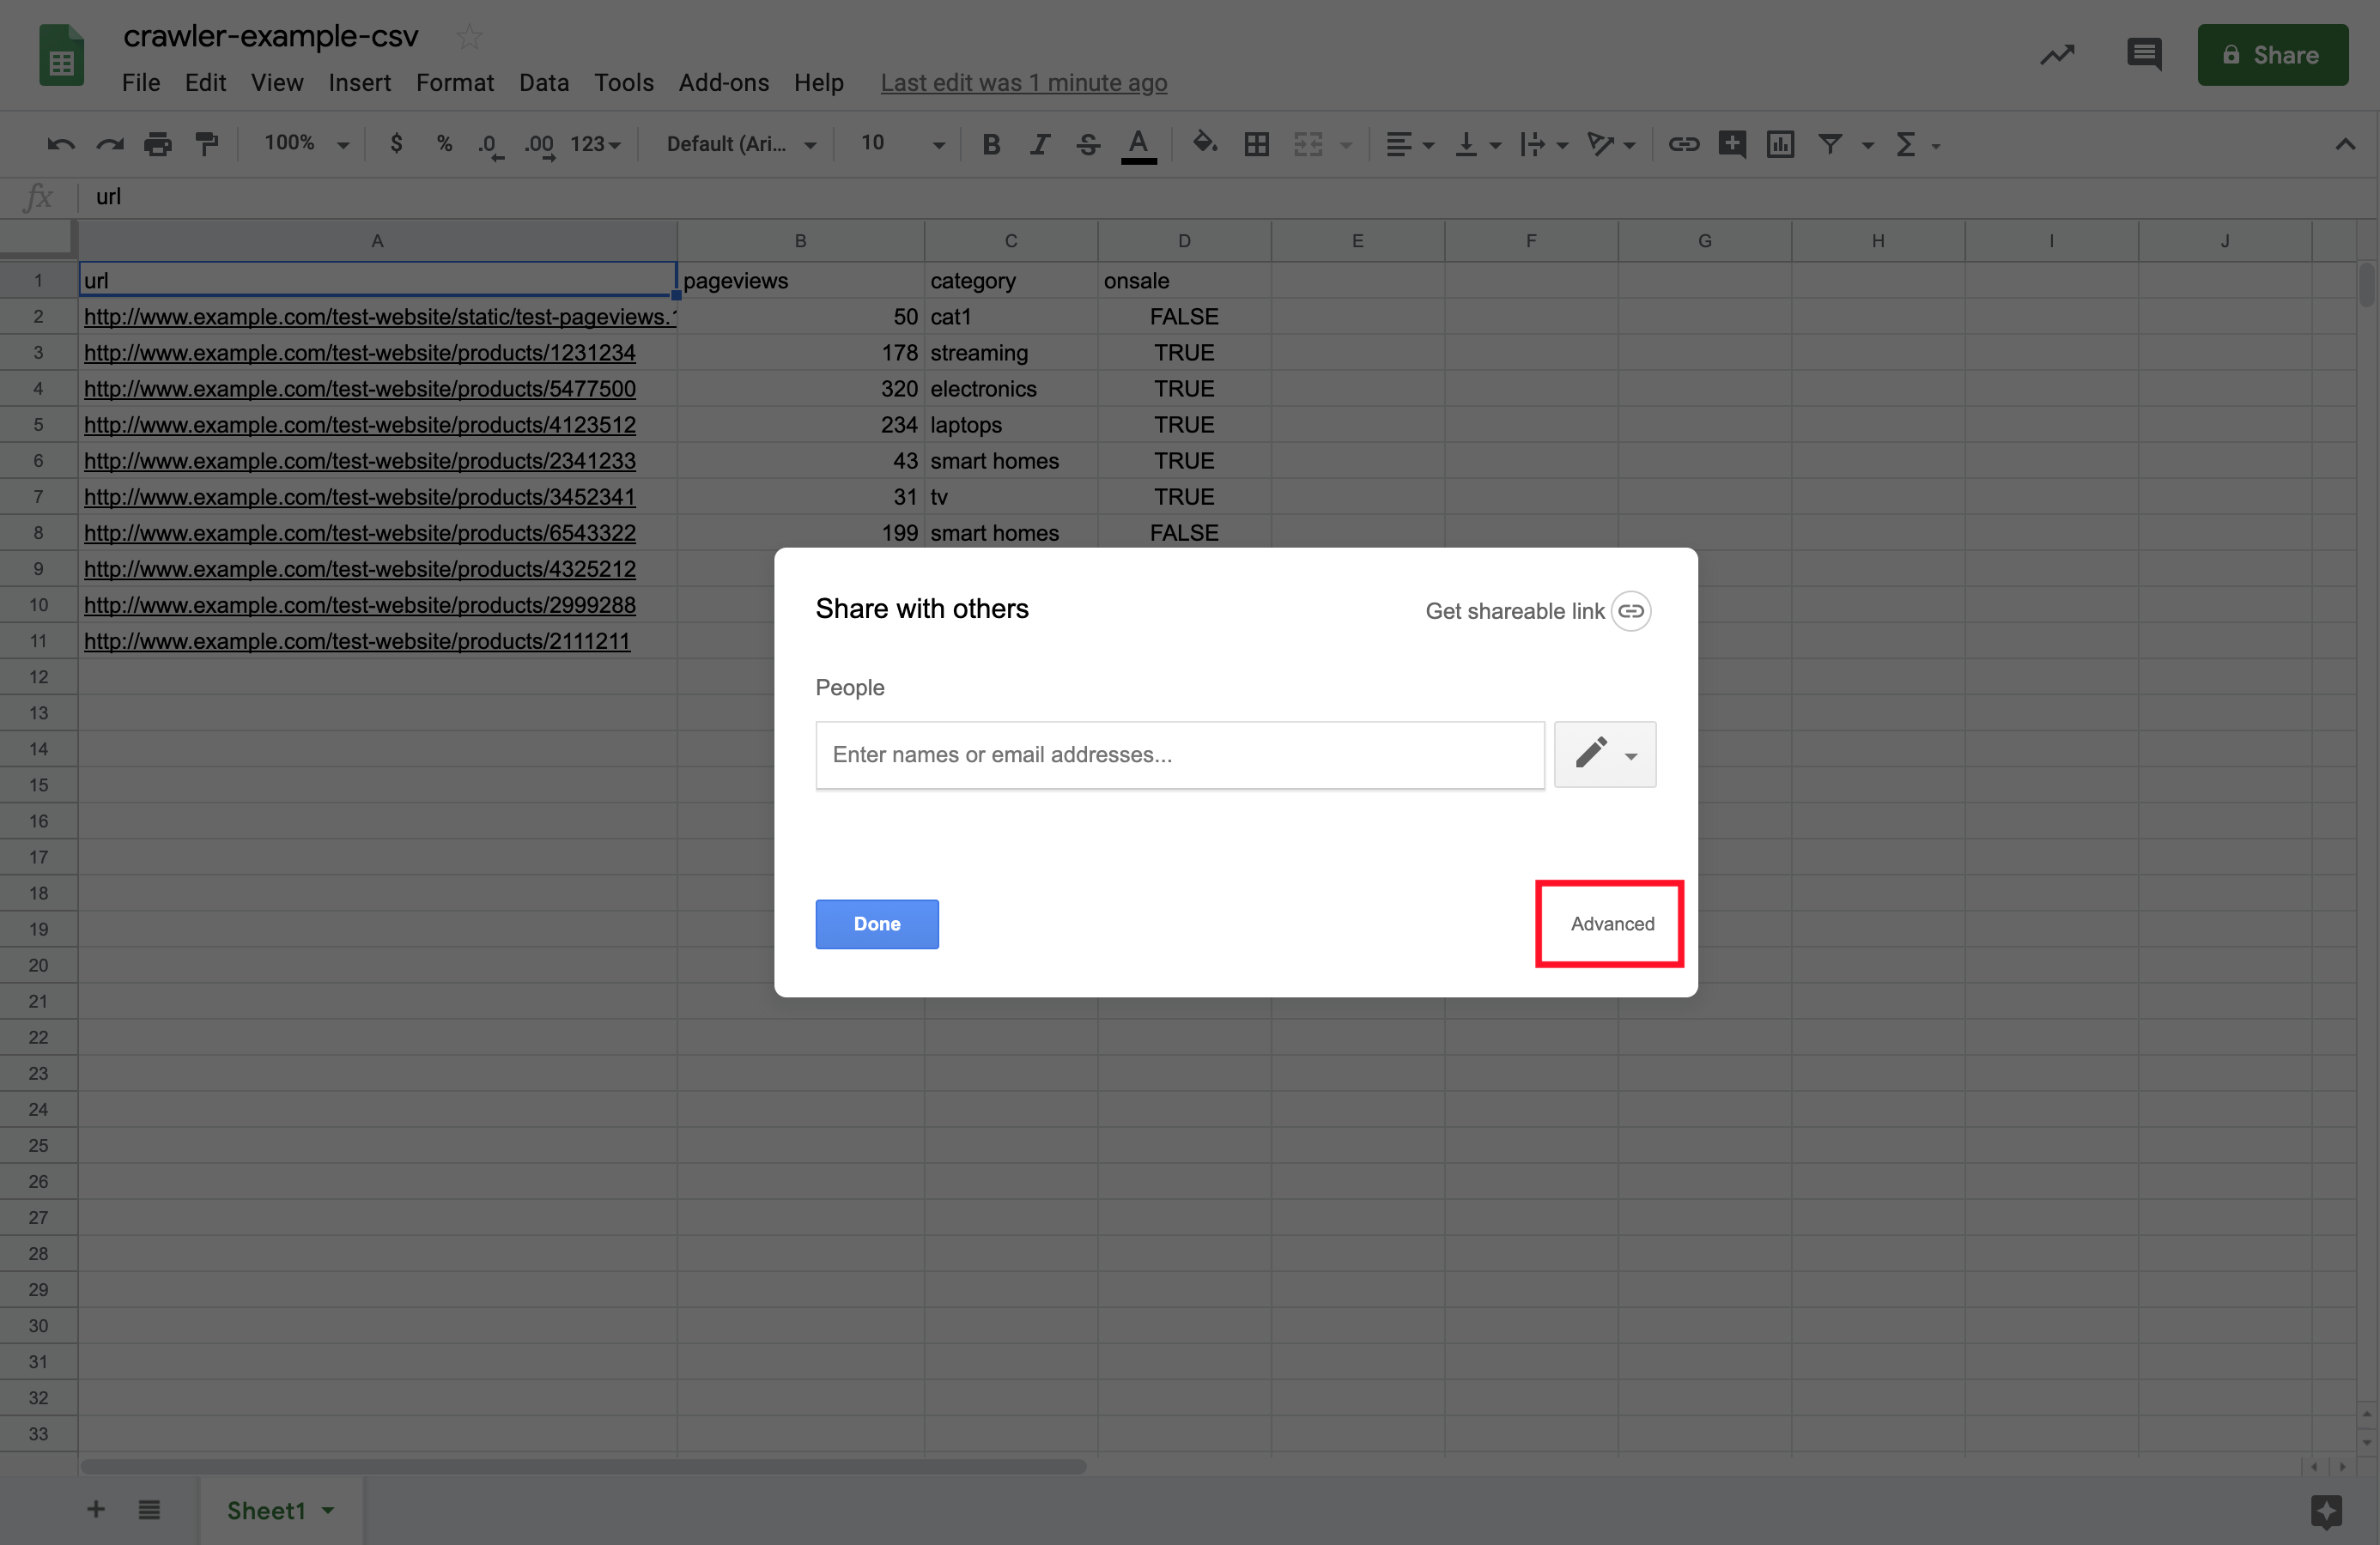
 2. Click on Advanced.
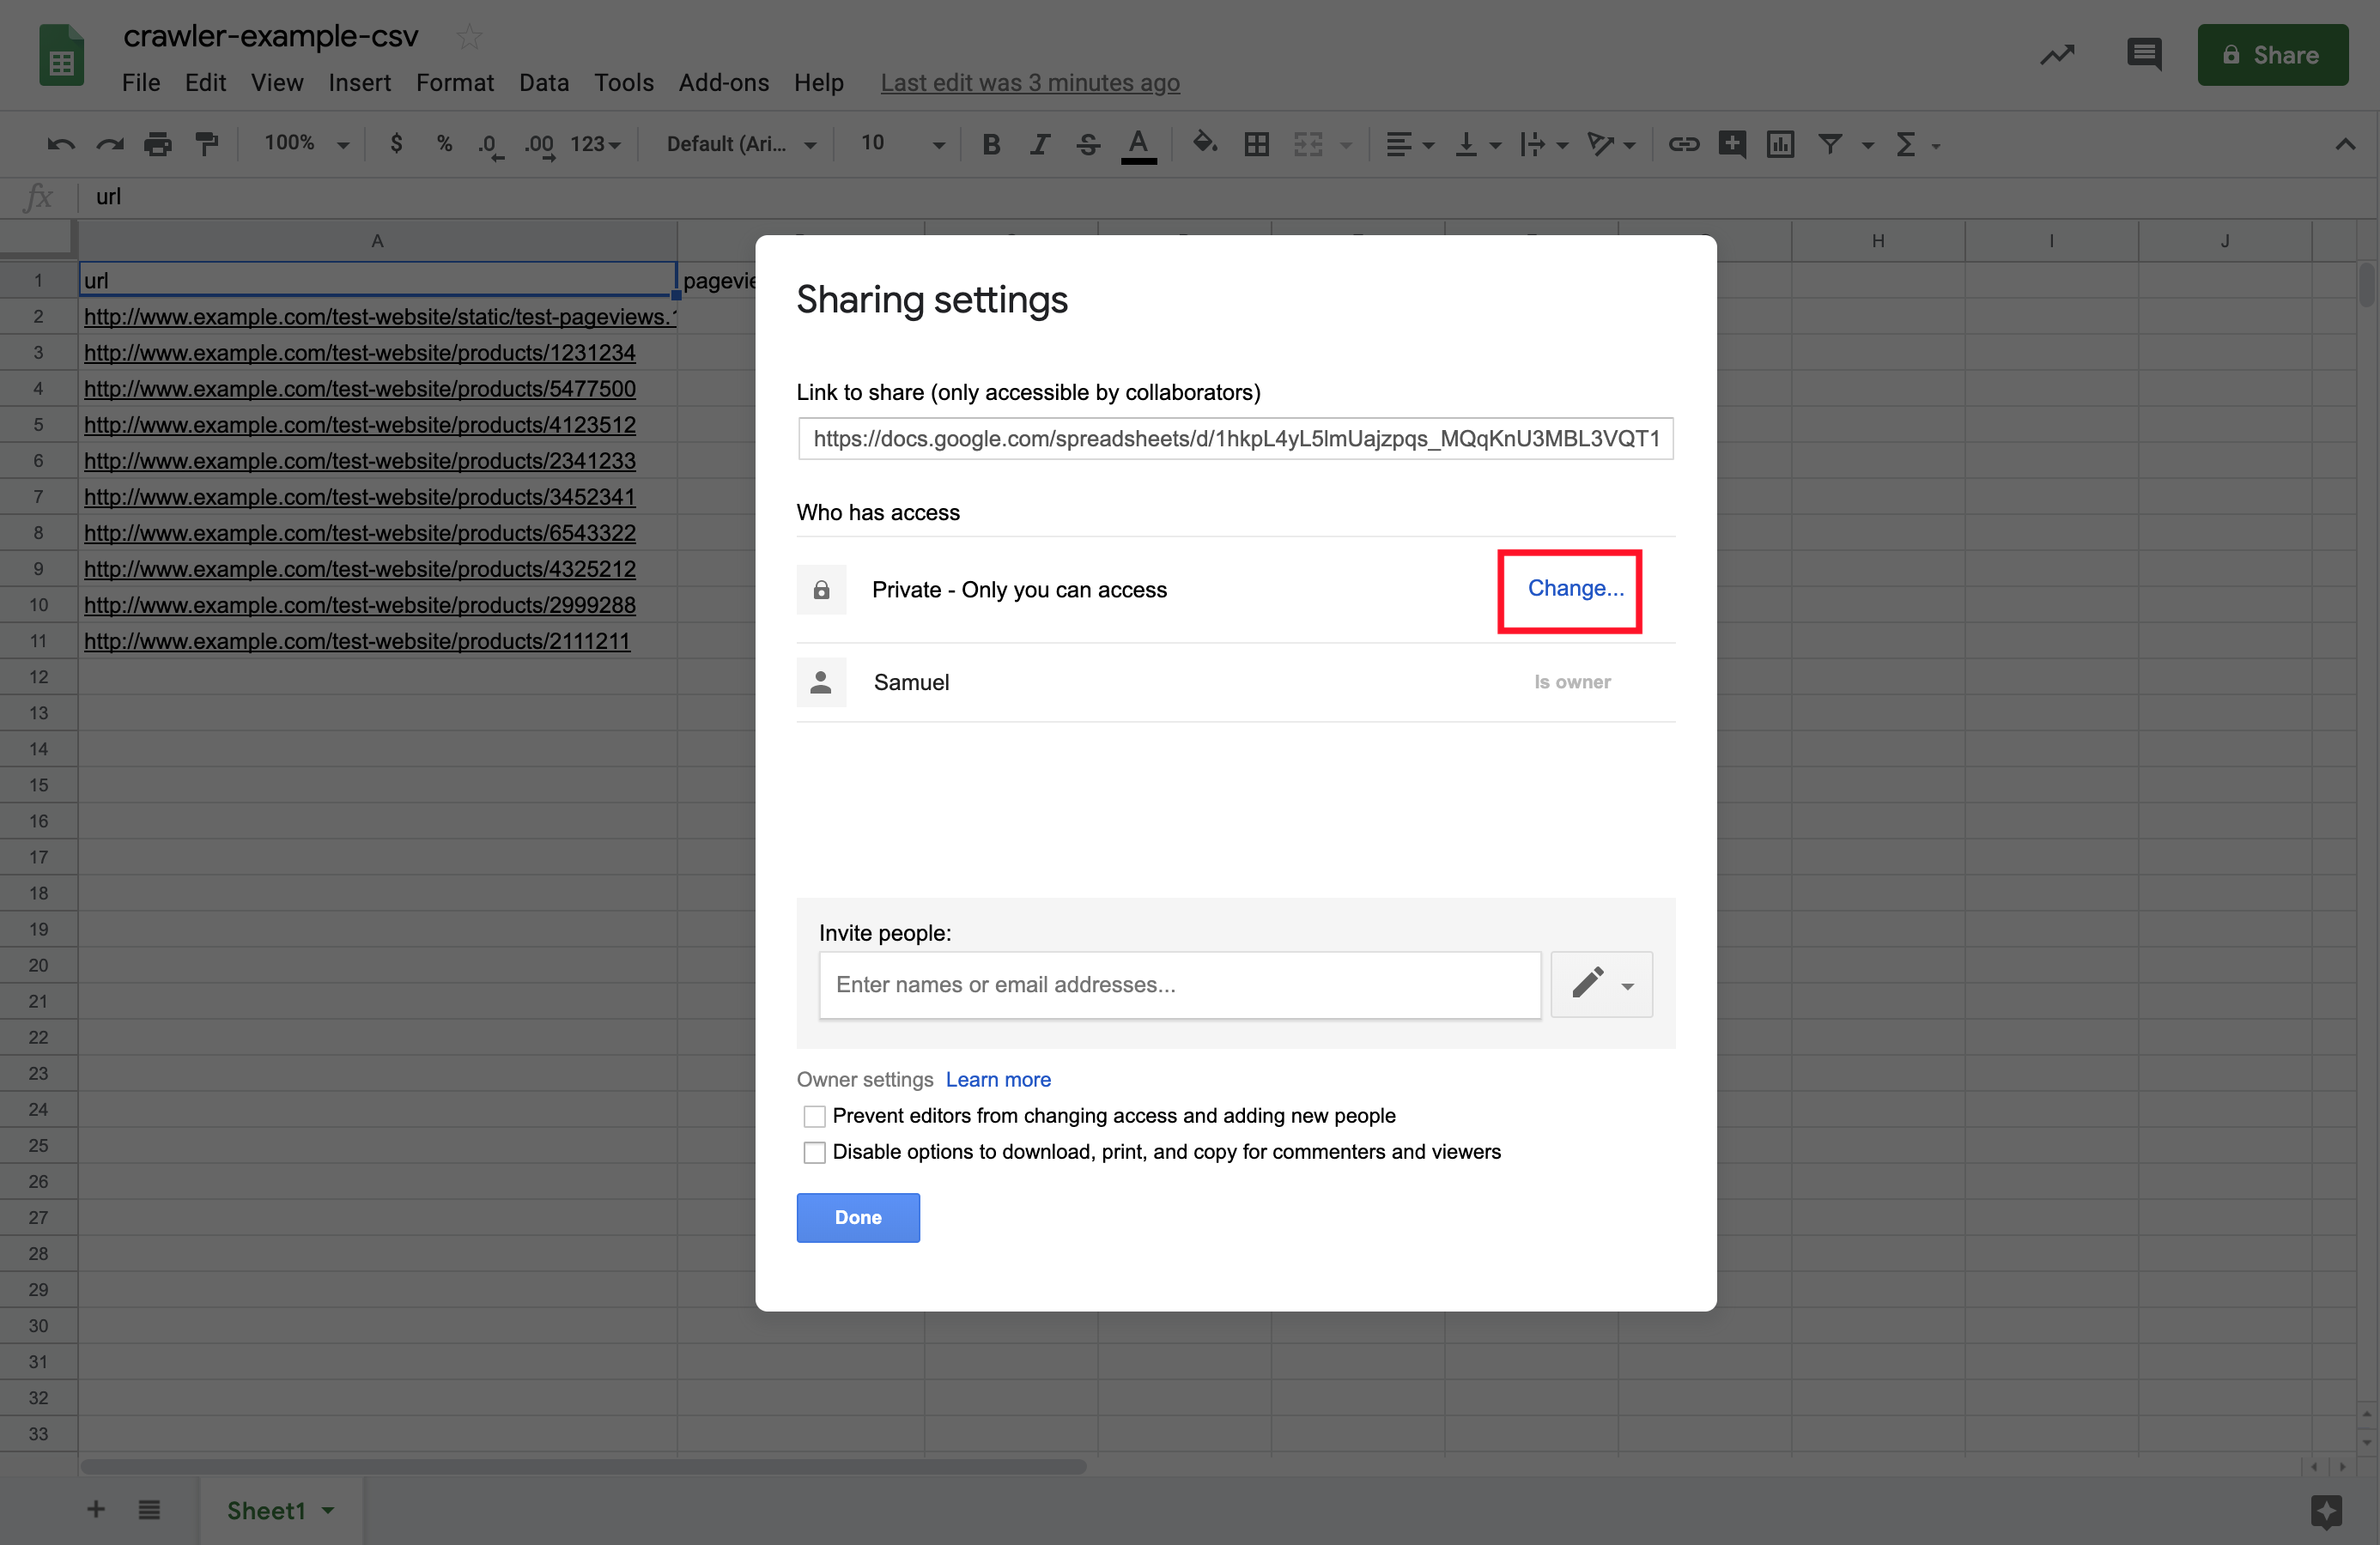
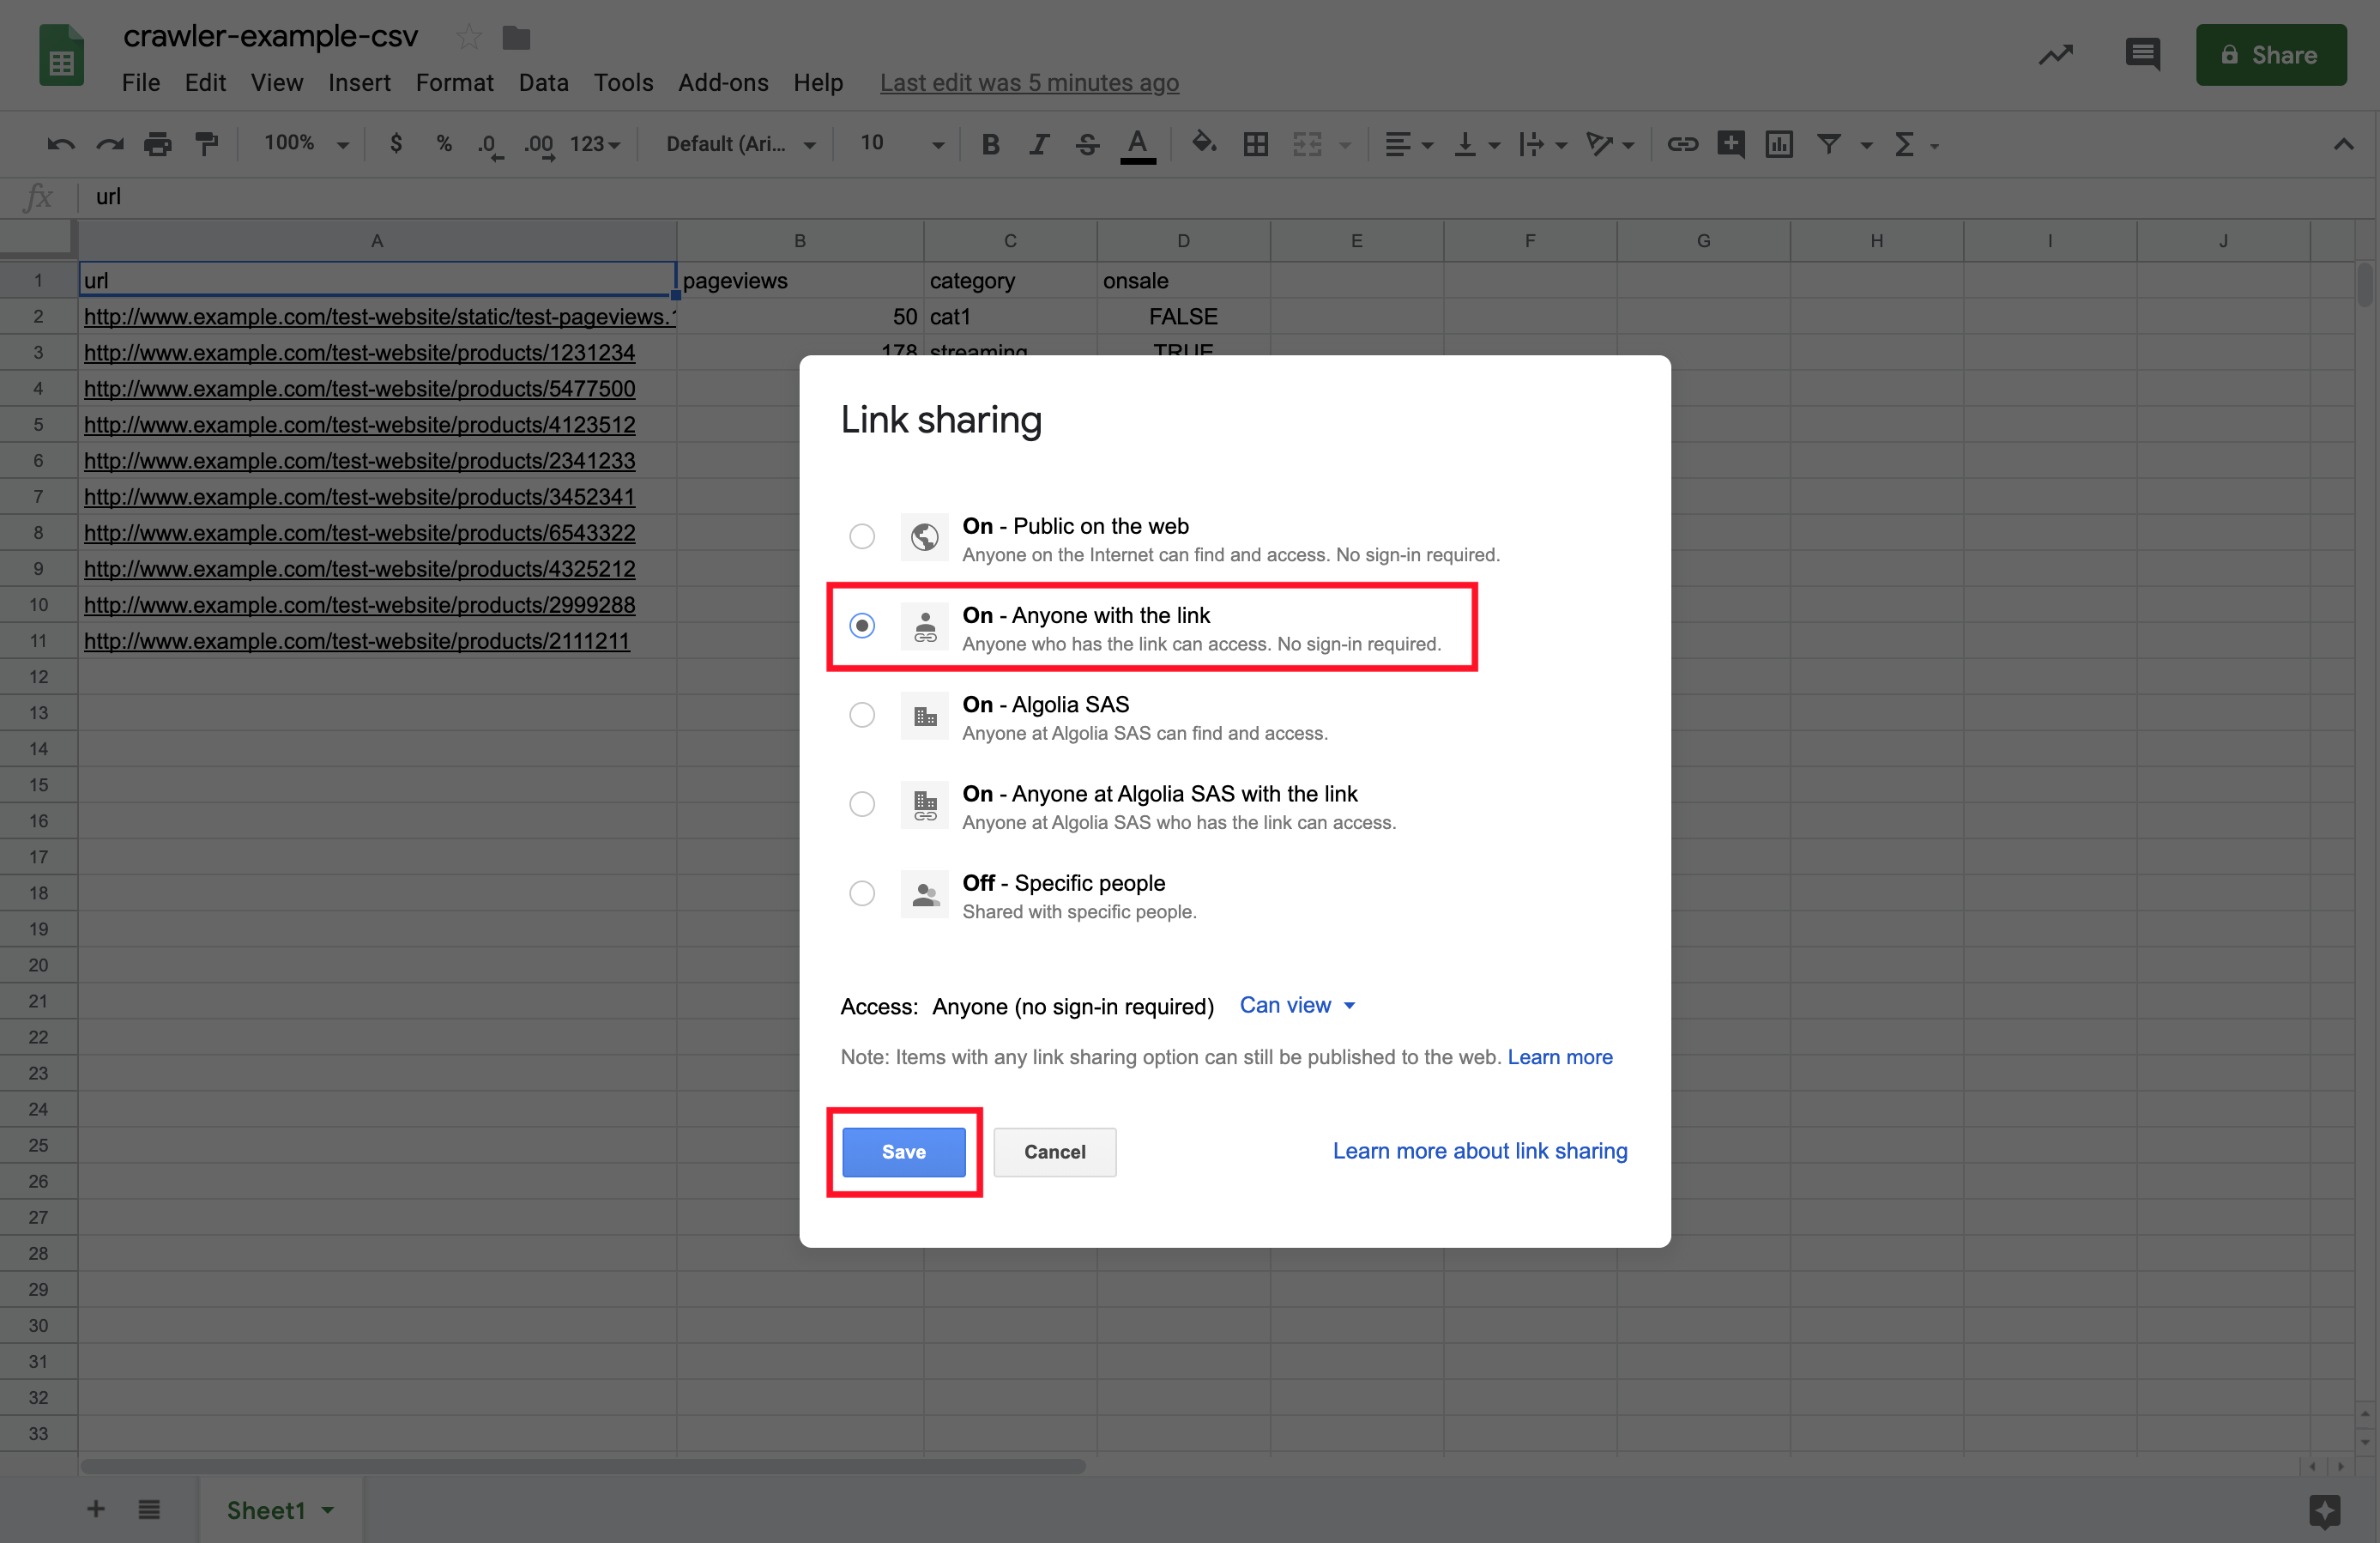
 3. Change the spreadsheet’s Sharing settings so that the file is accessible to anyone who has the sharing link.
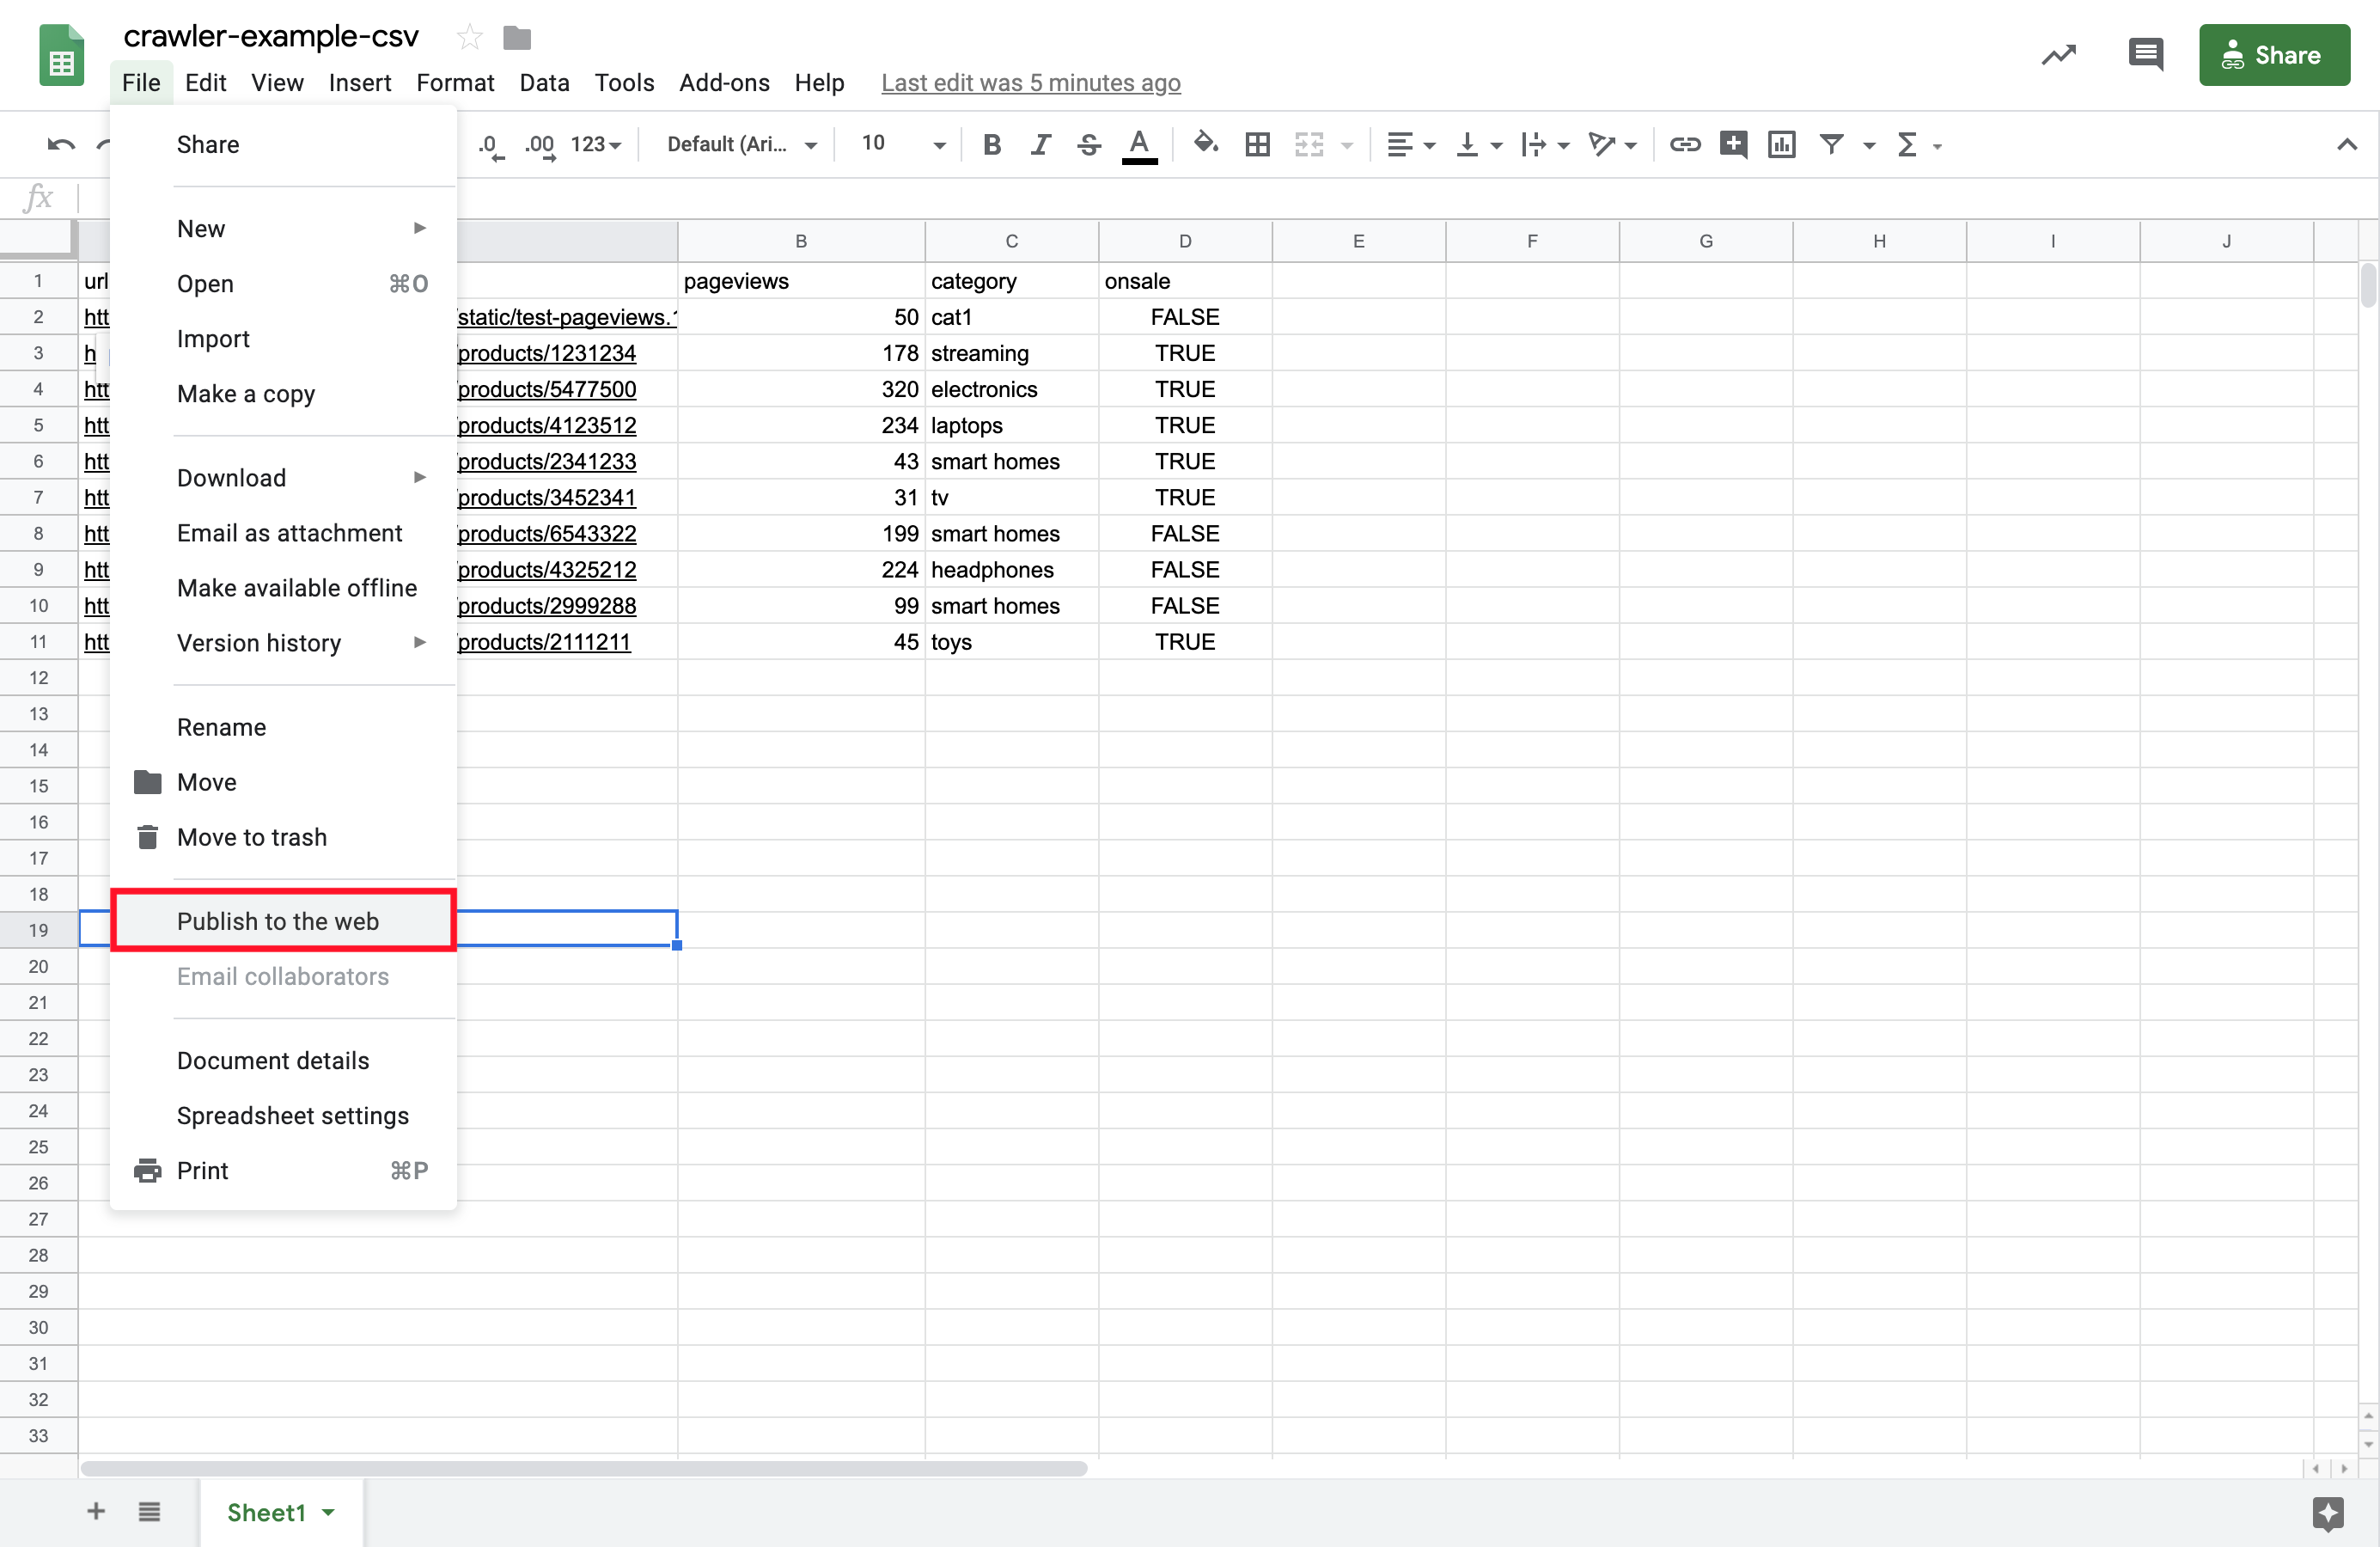
 4. Publish your spreadsheet to the web as a CSV file. To do this, click on the File menu, then Publish to the web
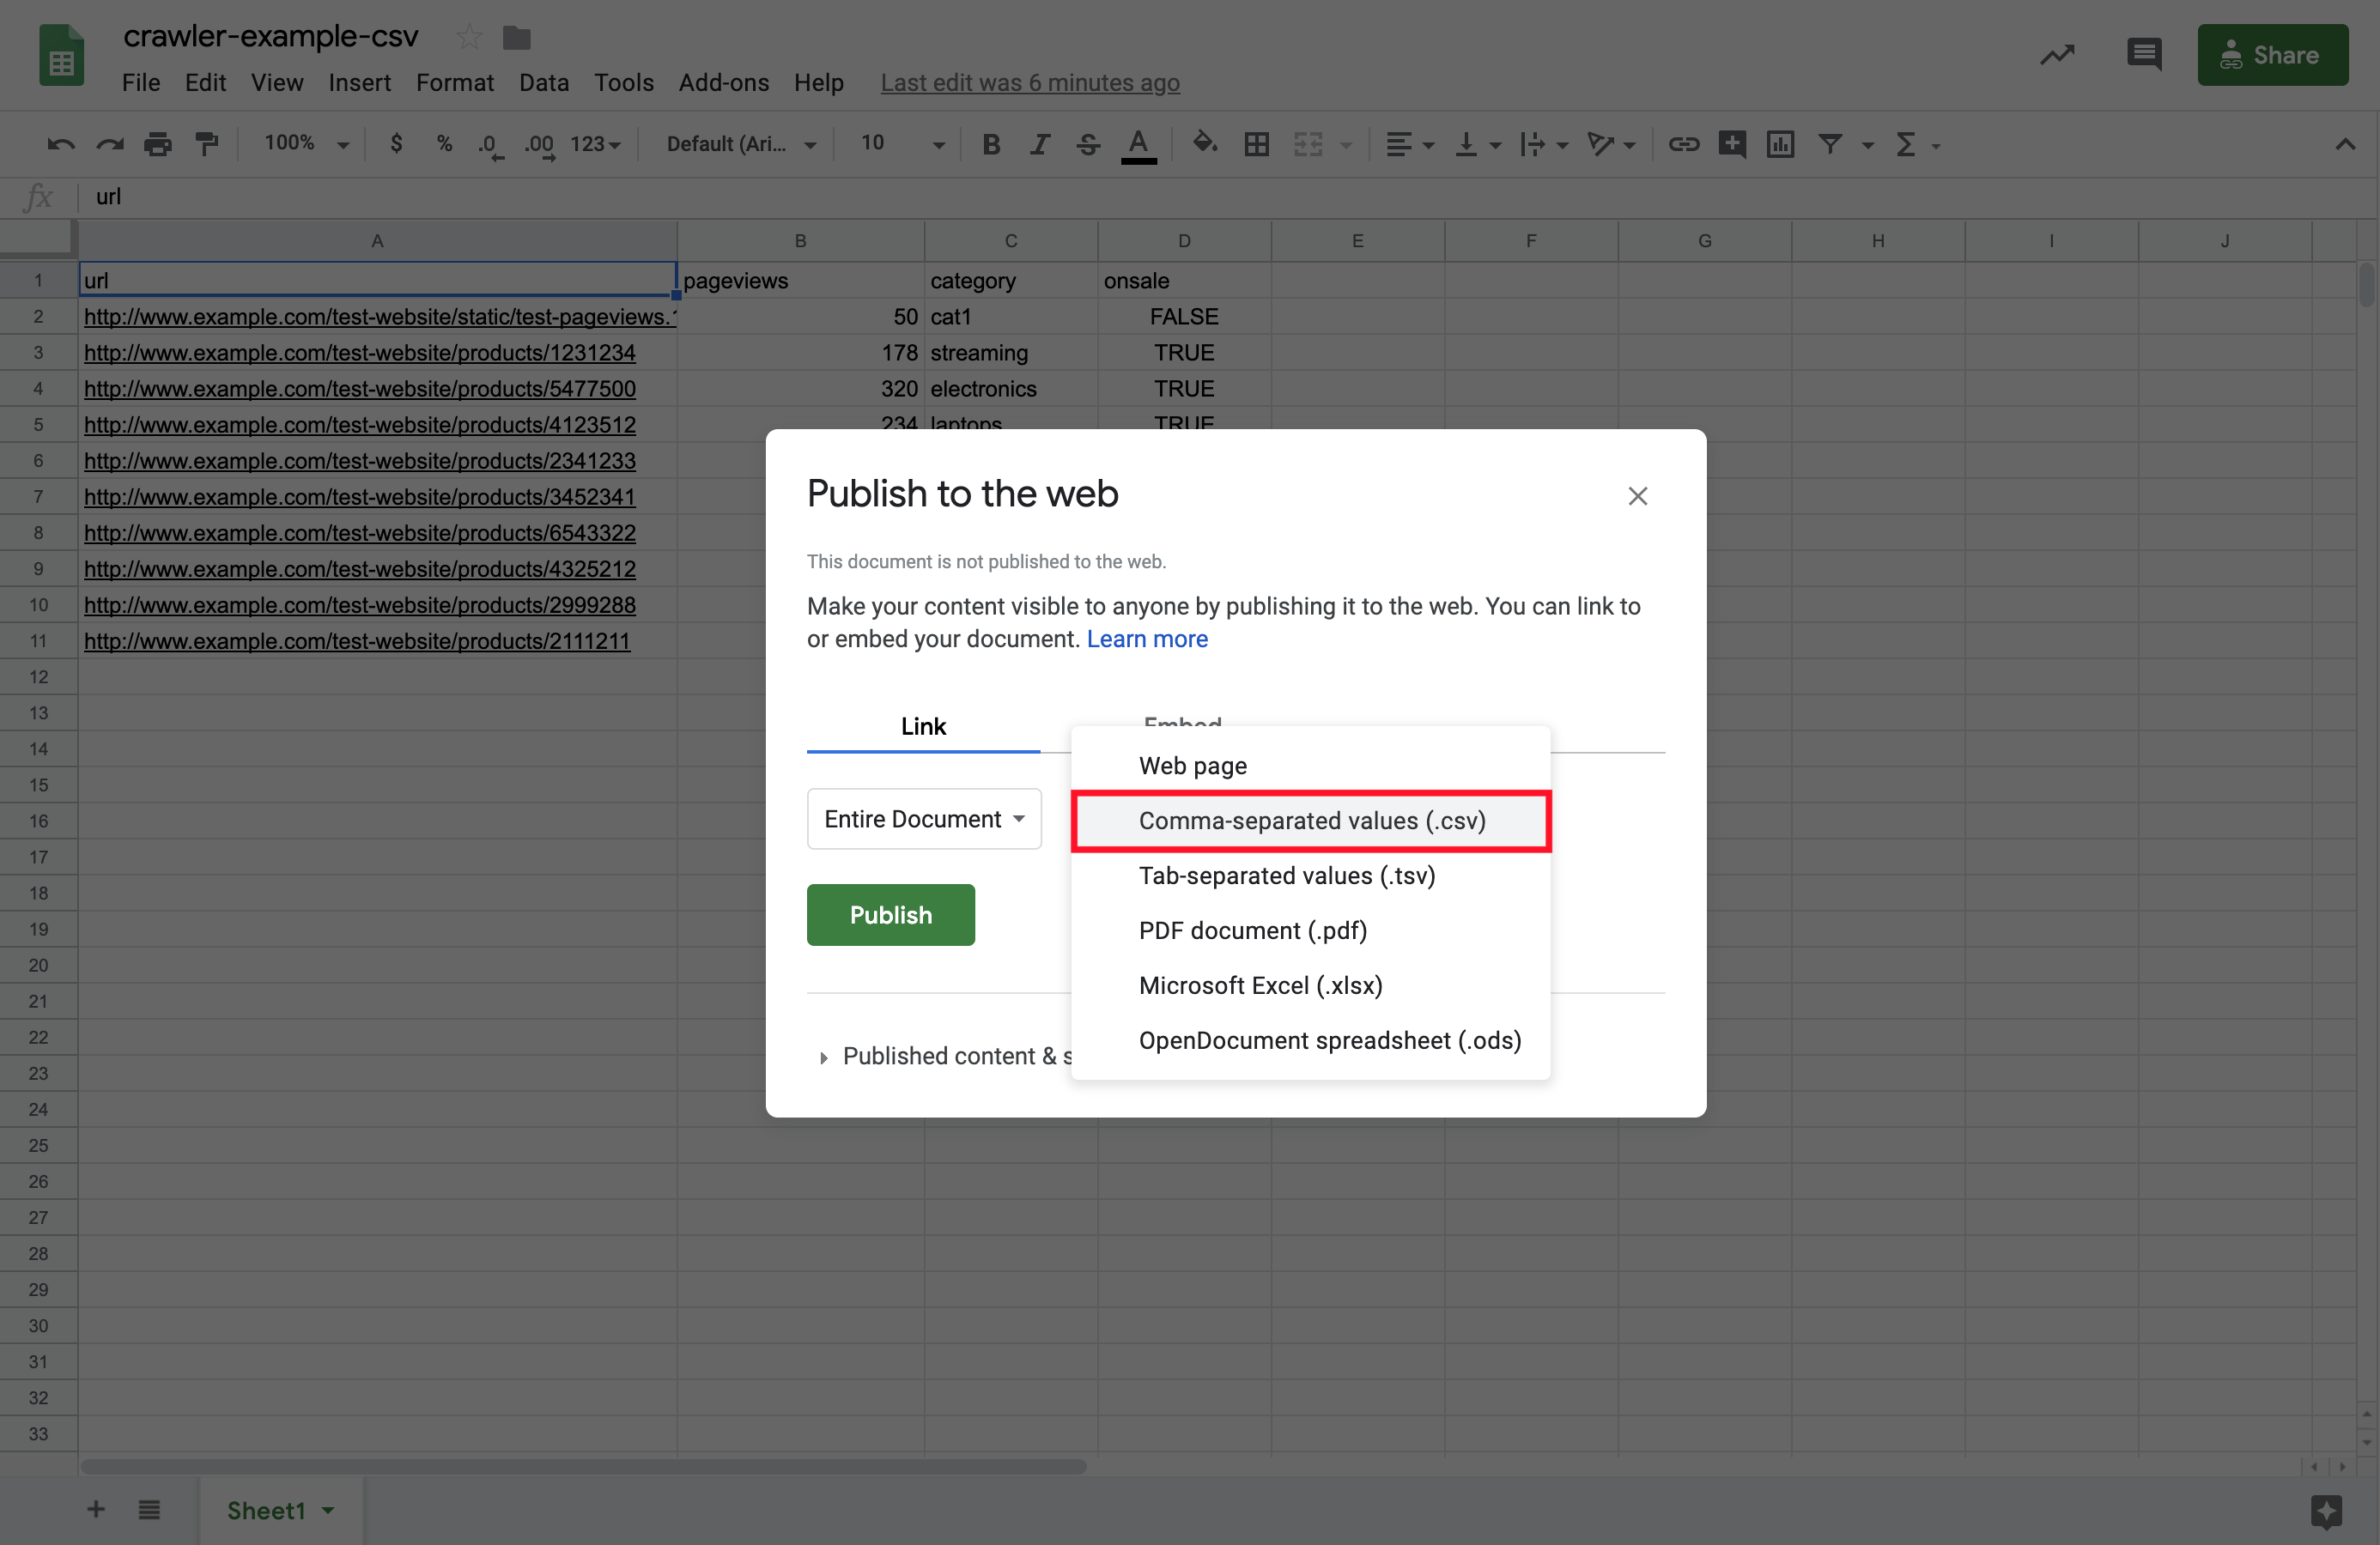
 5. Set the link type to Comma-separated values (.csv).
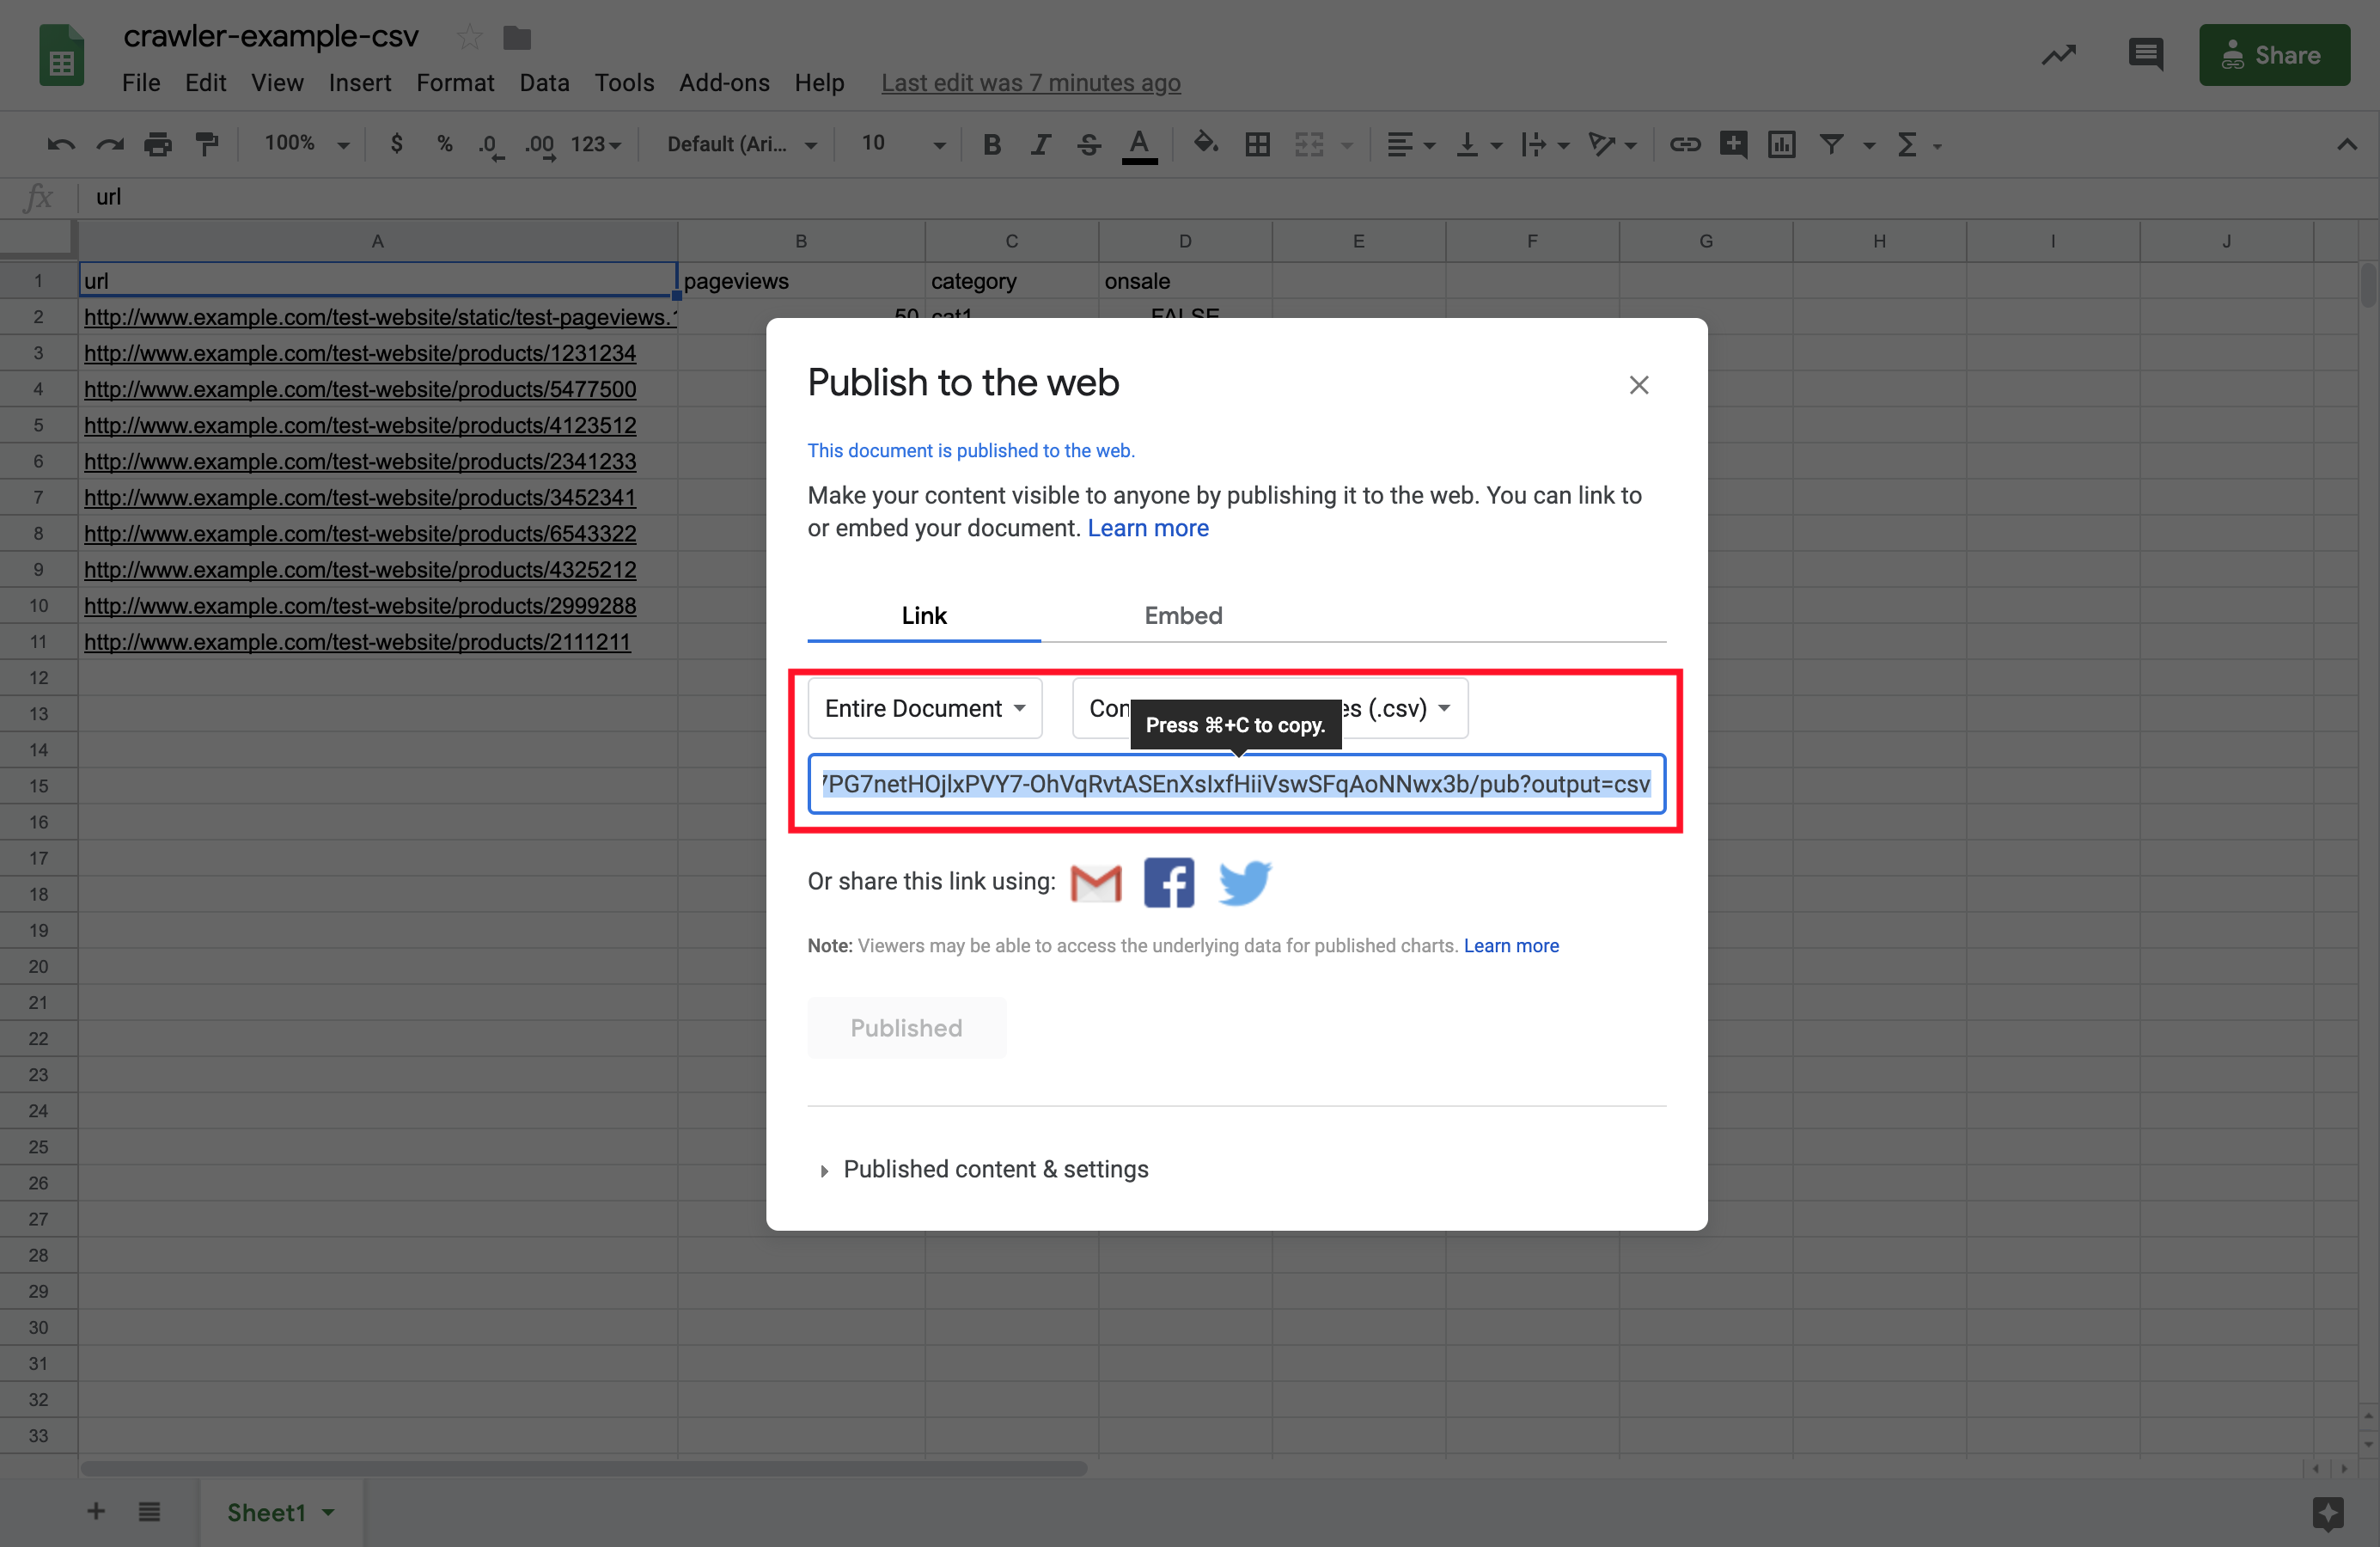
 6. The generated URL is the address used to access your CSV file.
Enabling automatic updates
The CSV file is generated with the current data of your Google spreadsheet. By default, all further updates to your spreadsheet changes the content accessed through the link.
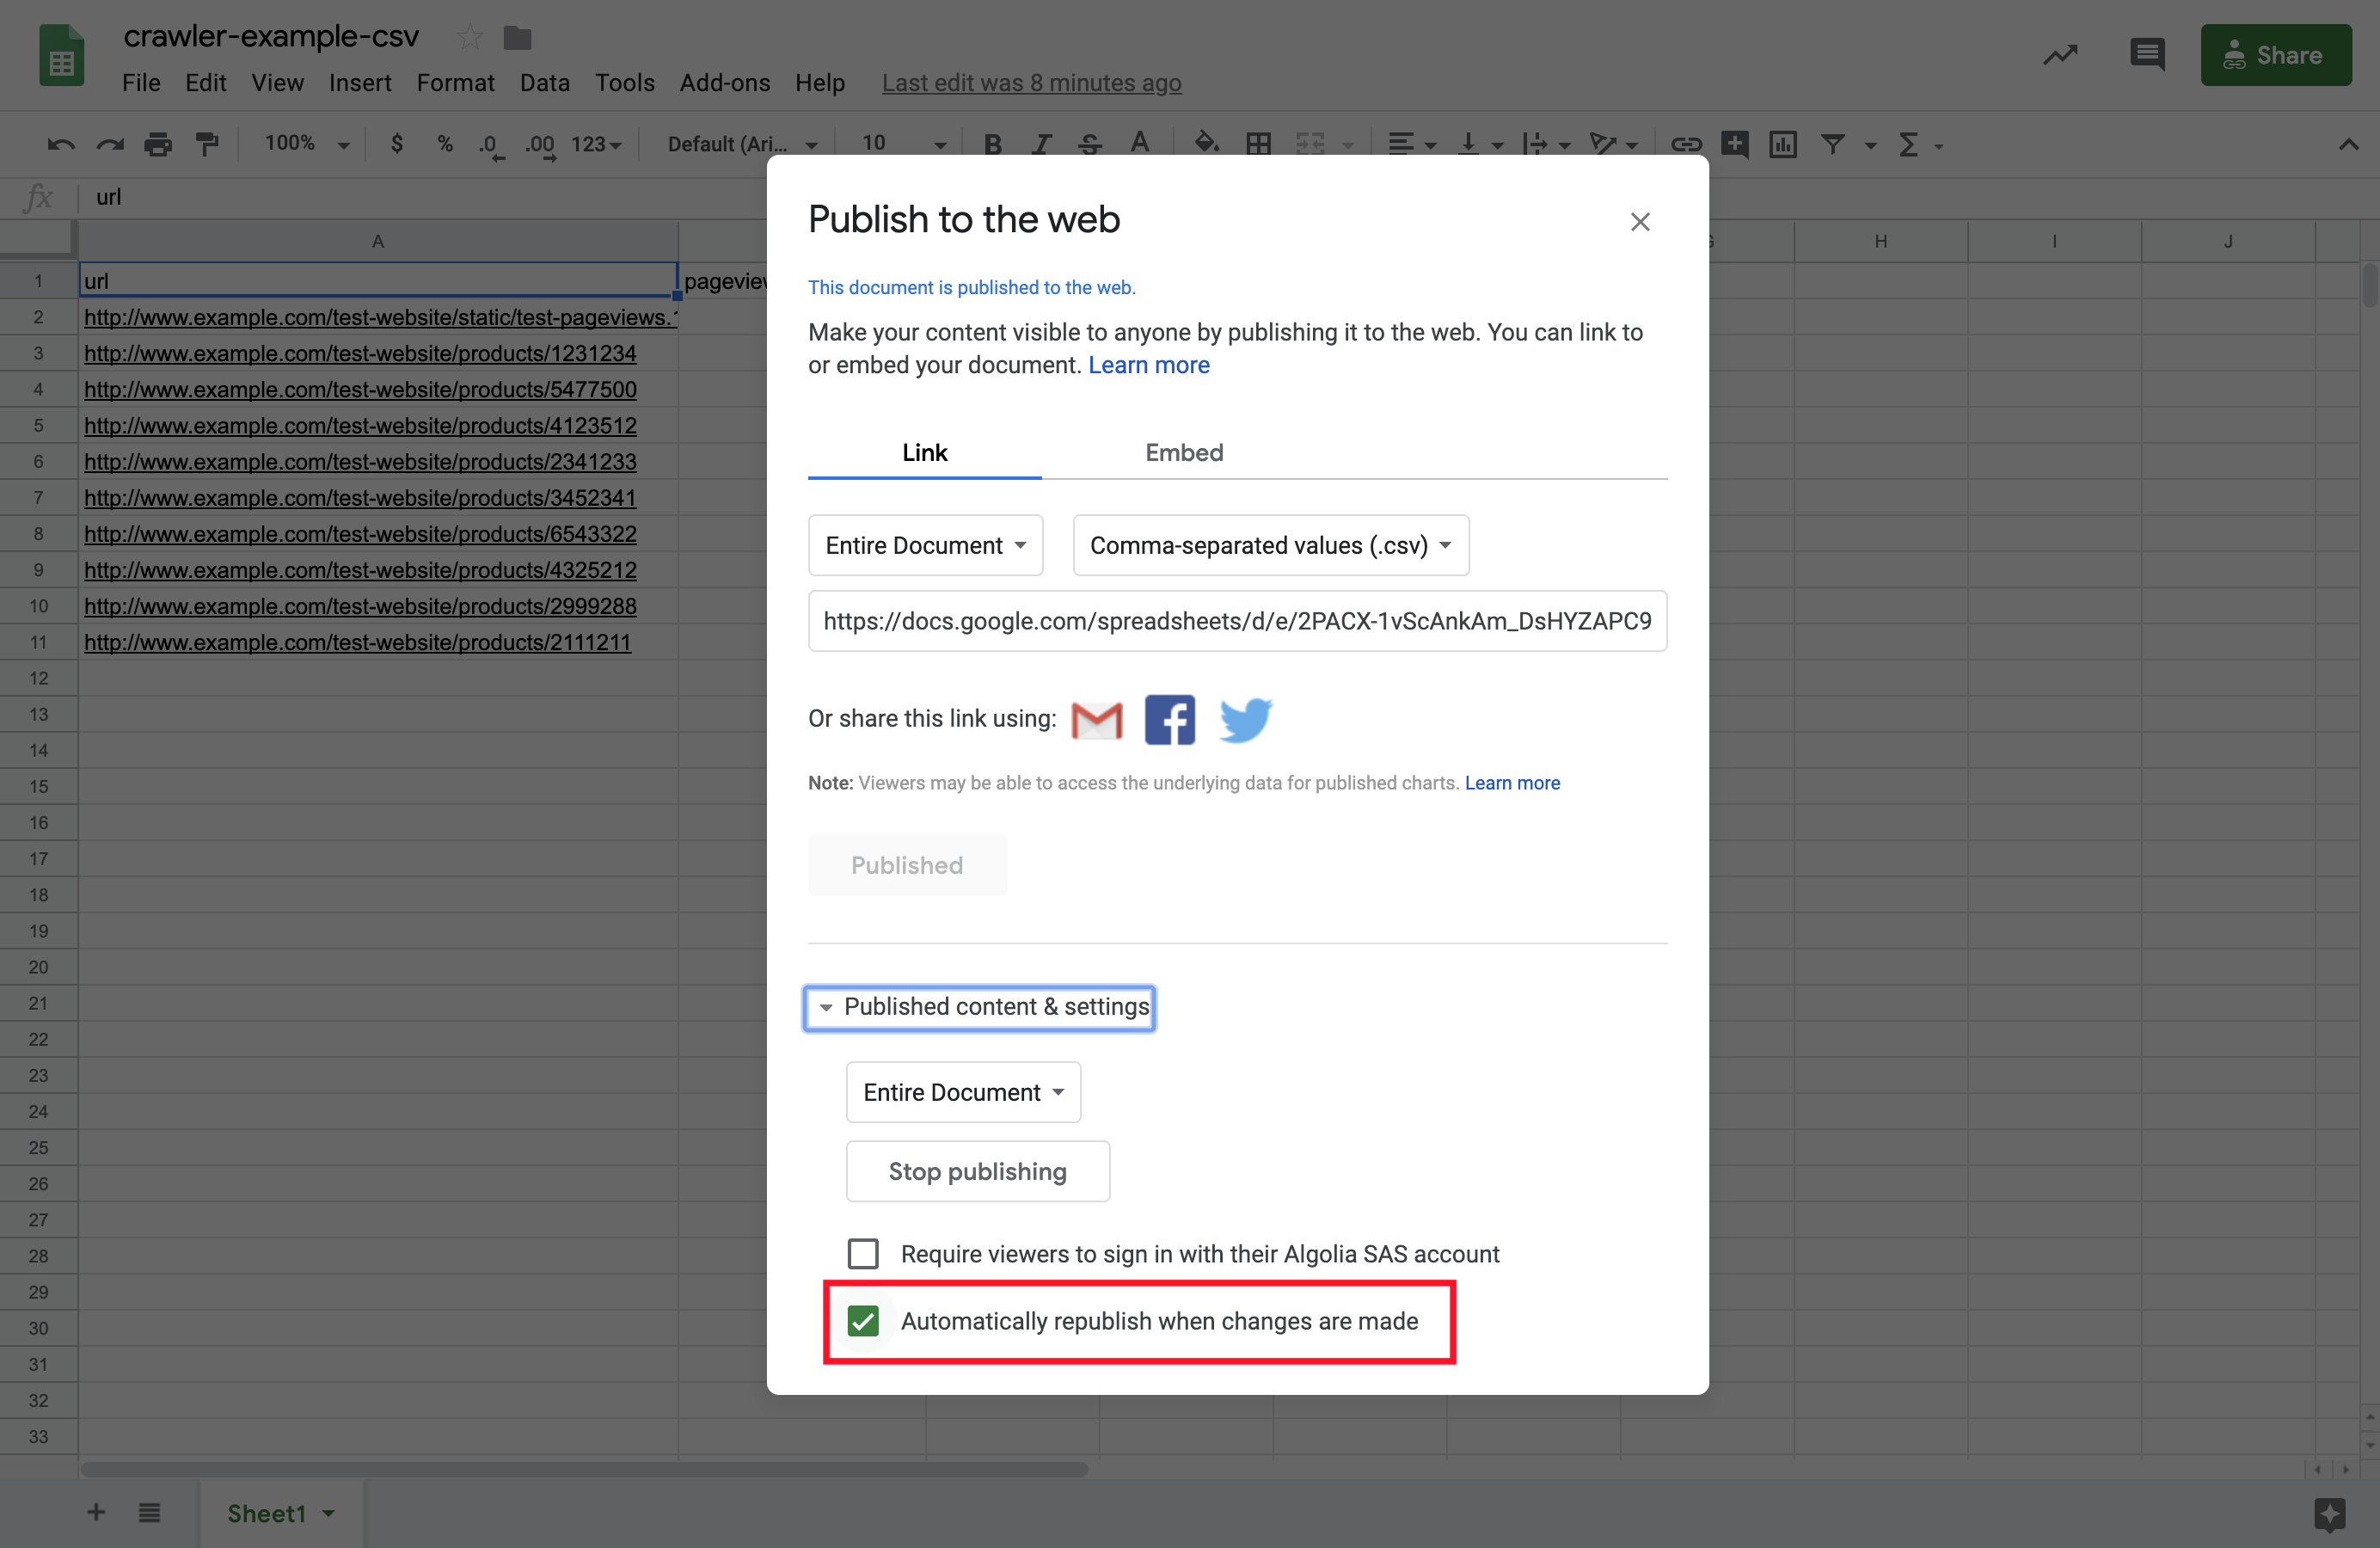
If you want to disable automatic updating, open the Published Content & settings section and uncheck Automatically republish when changes are made.
Link your published CSV to your crawler’s configuration
Create your external data source
Creating an external data source allows the Crawler to handle and manage your CSV file, and make it available for the crawler’s configuration.
- Go to Crawler Admin, and click the External Data tab.
- Click on New External Data source
- Fill in the form by choosing a unique name, for example ‘myCSV’, selecting the type CSV and filling in the URL.
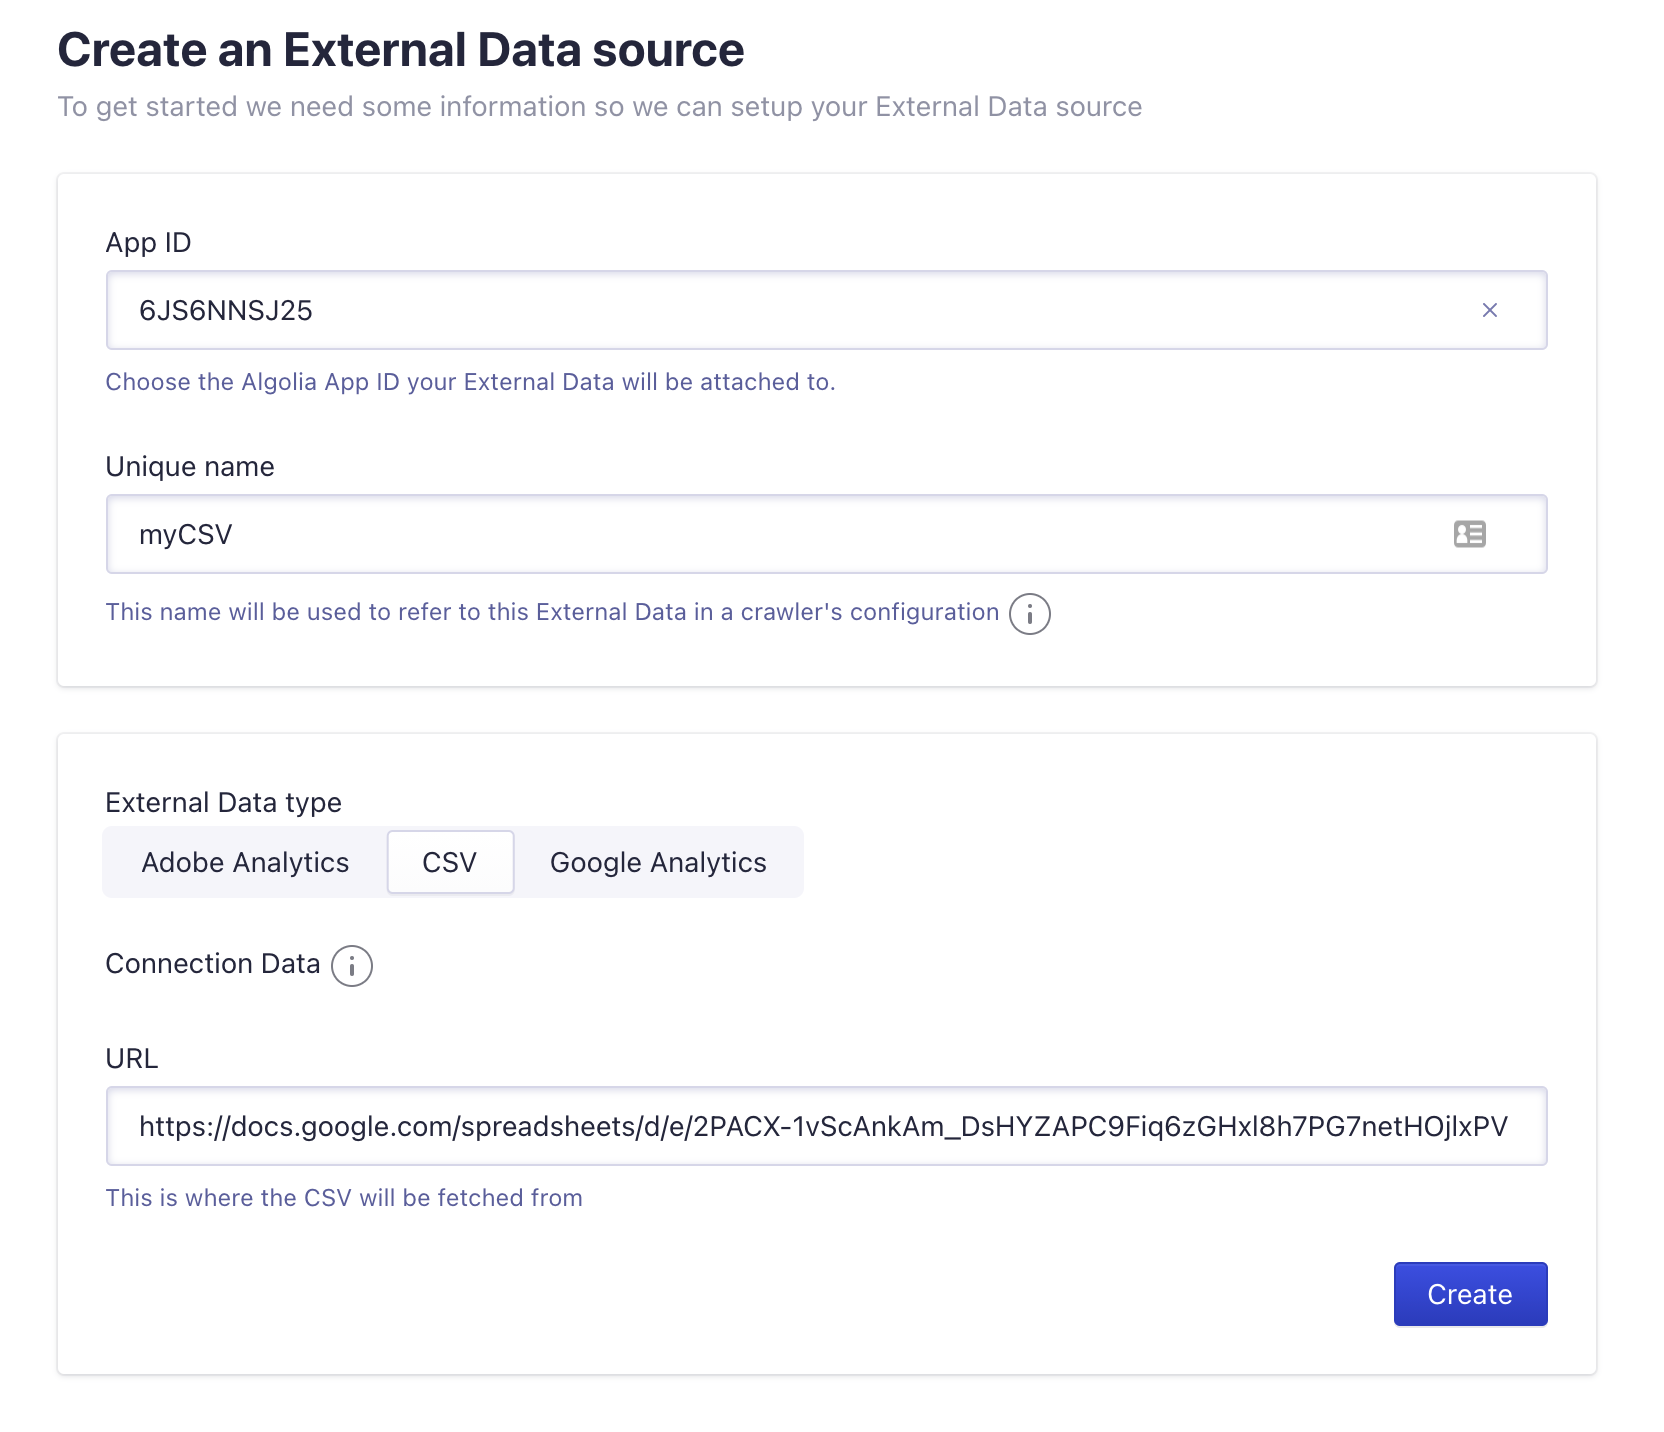
- Click on create to finish
- To manually test if the setup is correct, go to the Explore Data page by clicking the “looking glass” icon on the right.
- Trigger a manual refresh with the Refresh Data button and verify that you get the right number of rows extracted.
Reference the External Data in the crawler’s configuration
In this step, you’ll edit your crawler’s recordExtractor so that it integrates metrics from the published CSV into the crawler produced records.
- Go to Crawler Admin, select your crawler, and click the Editor tab.
- Add the
externalDataparameter to your crawler. You can insert it right before the actions parameter.Copy1
externalData: ['myCSV']
Note: the crawler only keeps data from URLs that match the startUrls, extraUrls or the pathsToMatch properties of your crawler’s configuration.
- Edit the
dataSourcesparameter of yourrecordExtractorto read values from the external data source you just defined, and store them as attributes for your resulting record.Copy1 2 3 4 5 6 7 8 9
recordExtractor: ({ url, dataSources }) => [ { objectID: url.href, pageviews: dataSources.myCSV.pageviews, category: dataSources.myCSV.category, // There is no boolean type in CSV, so here the string is converted into a boolean onsale: dataSources.myCSV.onsale === 'true', }, ]
- In the Test URL field of the editor, type the URL of a page with CSV data attached to it.
- Click on Run test.
- You should see the data coming from your CSV in the generated record.
If this doesn’t work as expected, use the External data tab to check that the URL is indexed and matches the stored URL (for example there could be a missing trailing /).
